DIY Tobacco Basket Tutorial
Why buy when you can DIY for so much less?
Material Needed:
- Super Finish Max
- Small Spray Shelter
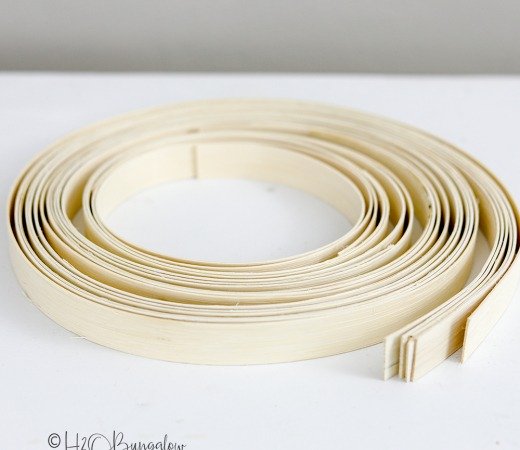
- 1" Basket Reed
- Painters tape for delicate surfaces
- Drill with small bit
- Brad type fasteners
- Wood stain
- Scissors
- Gloves
- Measuring tape
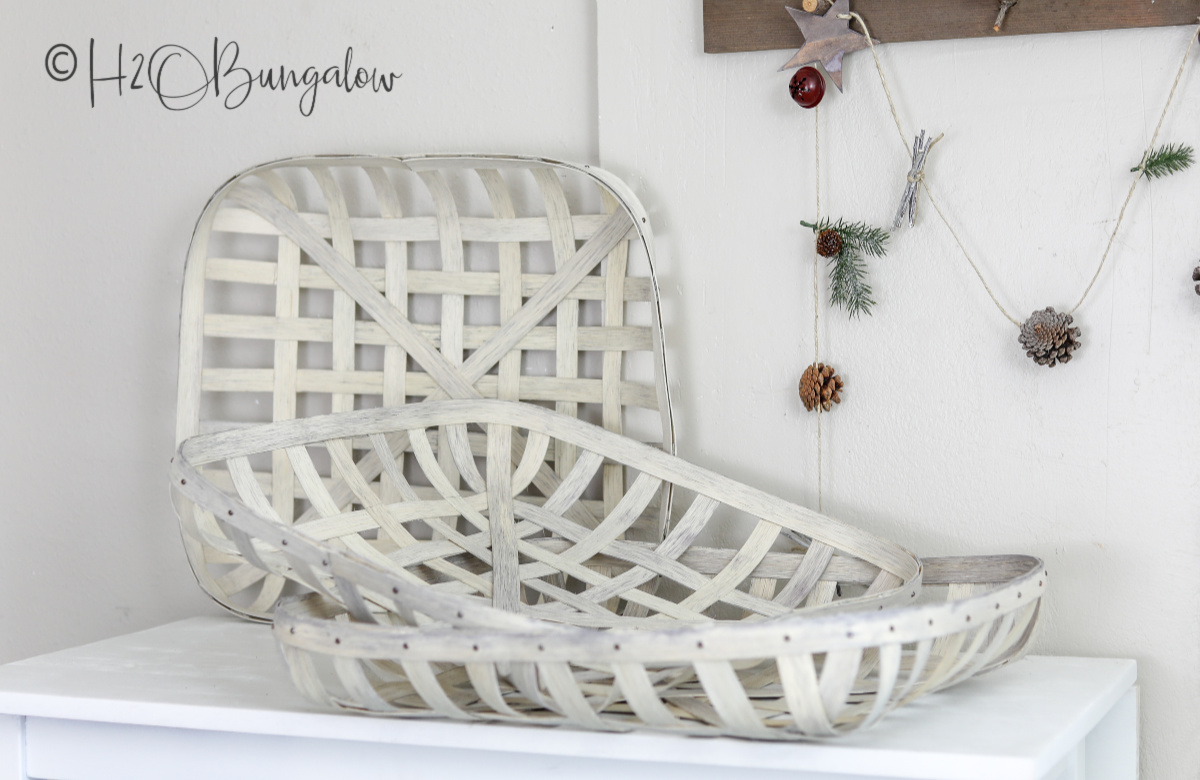
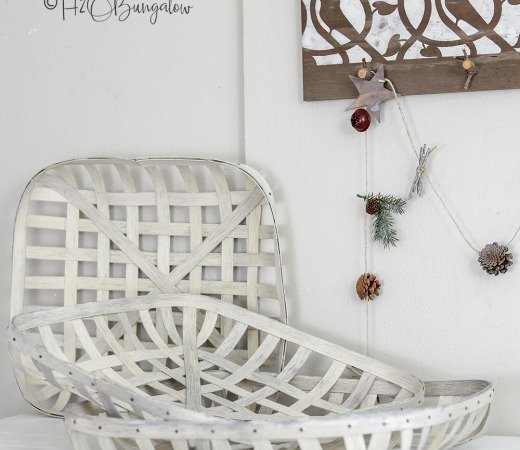
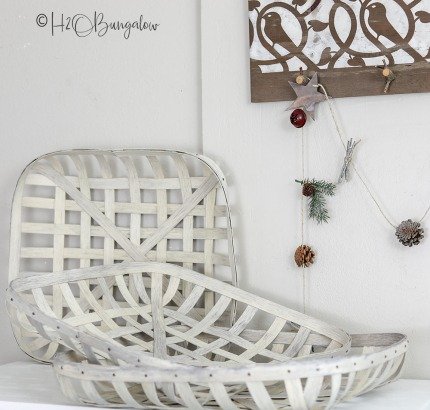
BEFORE
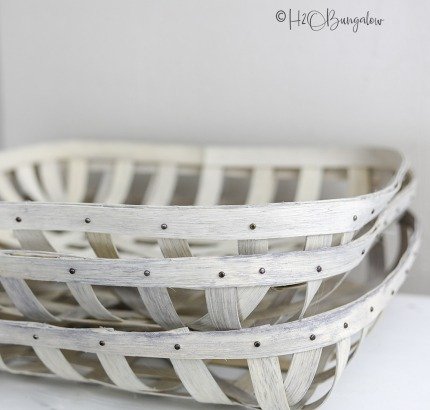
AFTER:
Project Steps
Learn to make your own DIY tobacco basket from basket reed at a fraction of what it cost to buy one.
STEP 1:
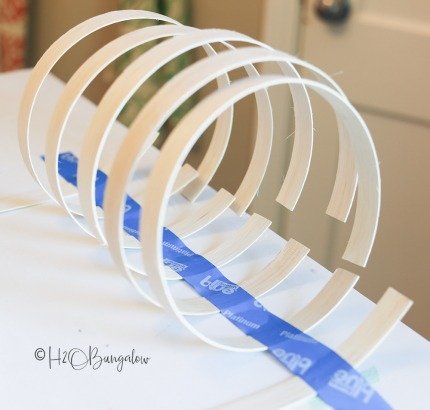
Cut the Reed Cut the basket reed into 14 pieces at 25” long, 2 pieces at 30” long and 2 pieces at 84” long.
STEP 2:
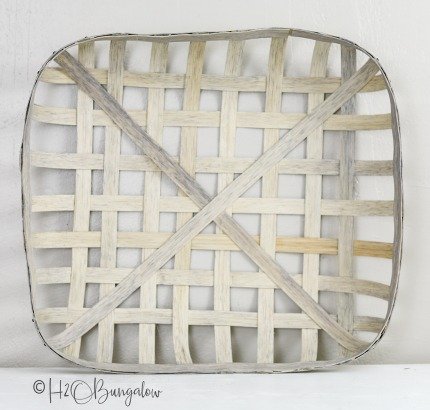
Measure and Tape Lay one piece of painter’s tape onto a flat surface. Mark each of the 25” pieces at 4” from one end. Thread 7 of the reed pieces through the tape, lining them at the 4”mark. The mark will be on the inside of the tape line. Spread the 7 reeds out evenly over 14”, this will be your basket base size.
STEP 3:
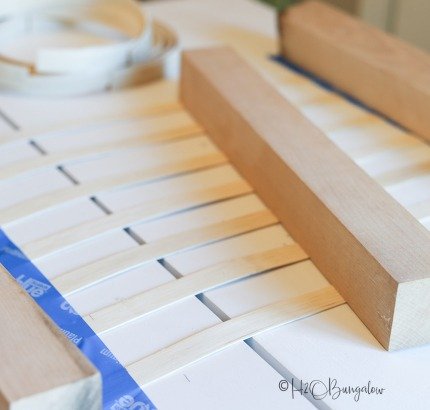
Measure and Tape the Other Side Use wood blocks to hold down the first taped side. Tape and space the other side down the same as the first side.
STEP 4:
Weave and Glue Use the 7 other 25” basket reed lengths to weave over and under across the first set. Eyeball and space them as evenly as possible. These will also be about 14” across. Use a glue gun and Gorilla Glue to tack down the outer place where one reed crosses over the other.
STEP 5:
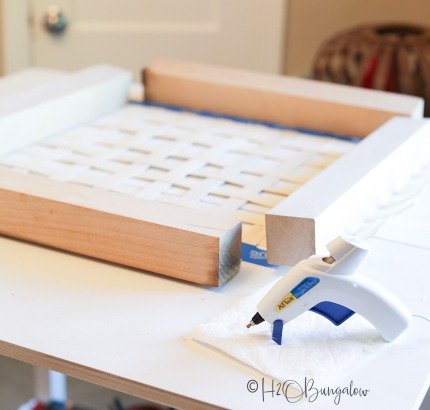
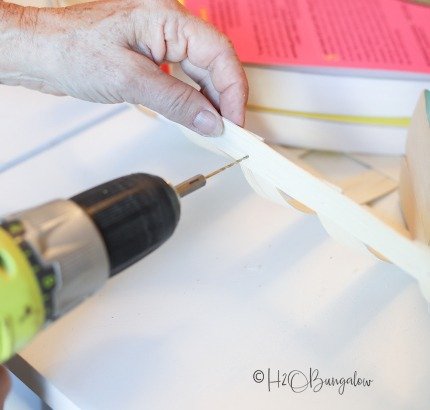
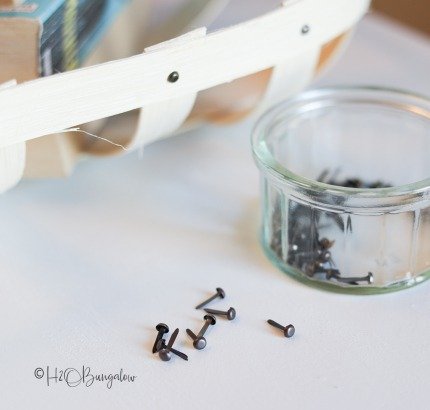
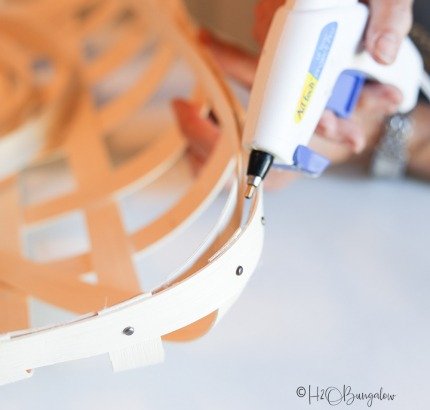
Glue, Trim, and Drill Remove the wood blocks as needed to do this next step. Measure and cut the basket reed at 4” from the woven section all around. Next, use the glue gun to tack one of the 84” basket reeds to the outside of each reed to form the lip of the basket. As you get to the corners hold the corners up to form a corner as you glue. Glue the entire basket all the way around and tack onto where you started. Trim the excess reed off. Use a drill and make a small hole on every reed all the way around.
STEP 6:
Secure with Brad Insert a small brad from the outside of the basket top through each drilled hole and open the ends.
STEP 7:
Cover the Brads Take the other 84” basket reed section, starting in the middle of a side and attach it to the inside of the basket. This strip will cover the opened back side of the brads.
STEP 8:
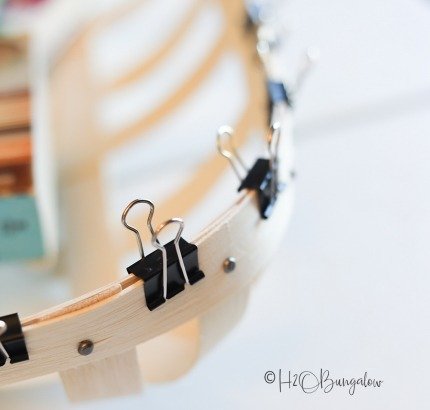
Finish Gluing Reed to the Inside Work in sections gluing the 84” strip of basket reed to the inside all the way around. Cut it when it reaches the starting point. Use office clips to hold the reed in place while the glue cools. Fill the bottom of the basket and let it sit overnight to shape the base flat.
STEP 9:
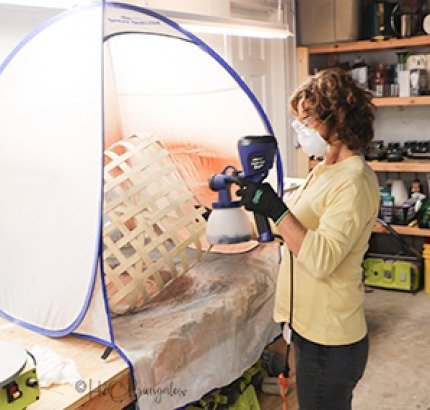
Paint or Stain the Basket Use the wood accelerator or your choice of stain and a Super Finish Max paint sprayer and Small Spray Shelter to stain the basket. Let dry completely before using.
STEP 10:
Enjoy your new basket! Click over to my post to see how I styled my DIY Tobacco basket.
STEP 11:
Looking for more ideas on how to use your new awesome baskets for seasonal decor? Read my DIY tobacco basket decorating ideas post!

Download project steps & shopping list
We'll never share your email with anyone else.