Create a Harvest Gift Basket
Learn how to create a cost effective, decorative fall themed harvest gift basket this autumn season using your HomeRight paint sprayer.
Summer is coming to a close quickly and the autumn season is upon us. It’s one of my favorite times of year because of the harvest season. All the bounty that is afforded from our spring plantings and summer weeding and watering are all brought to fruition this time of year. What better way to celebrate than to create a harvest gift basket for a family member or friend? Let’s celebrate this season of cozy.
Step 1
I don’t know about you, but getting that unexpected gift makes me feel so special. To think that someone thought of me outside my birthday or holiday warms my heart. Maybe you know of someone going through a difficult time or just needs a “hug”. First, grab a basket from your closet (don’t we all have some tucked away?) or from a thrift store or consignment shop. I challenge you to skip the box store and hunt one of your own. It’s half the fun! My kids know my affinity for baskets, so one of them brought this one home for me. It’s big and beautiful.

Step 2
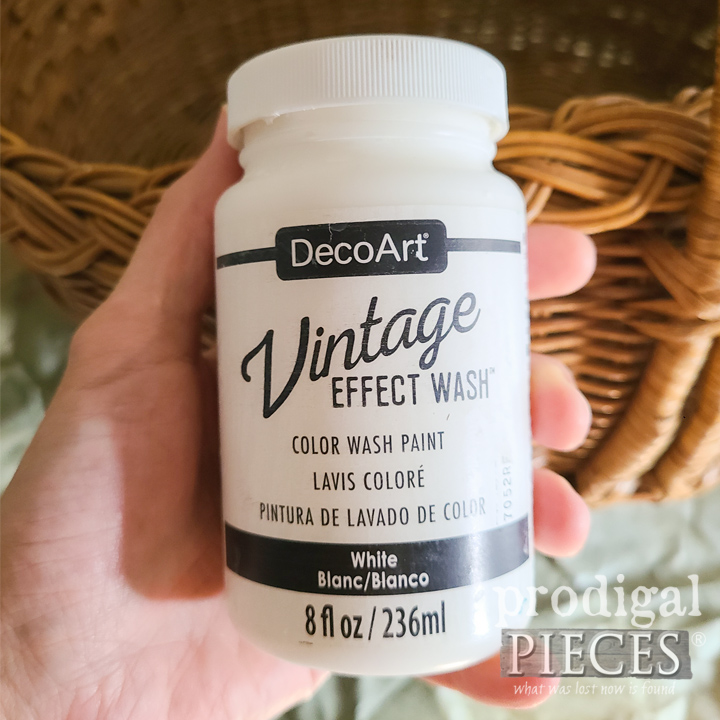
Since I prefer to use found, it’s important to give them a light cleaning for the purposes of adhesion. Use a dust brush or soft bristle broom to make sure your basket is ready to go. Then, let’s break out the tools to get this done fast and easy. For today’s purposes I’m using this wash mixed with my paint stash and a bit of water.
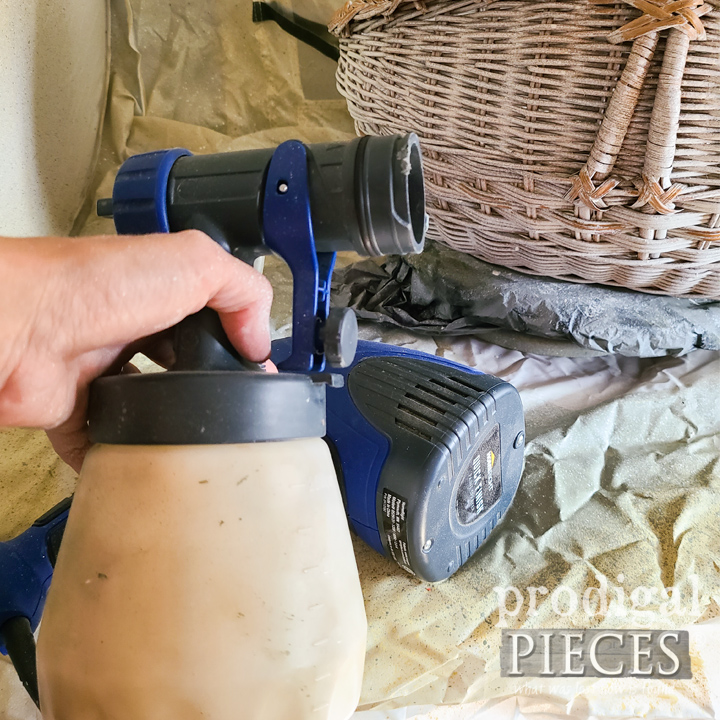
Step 3
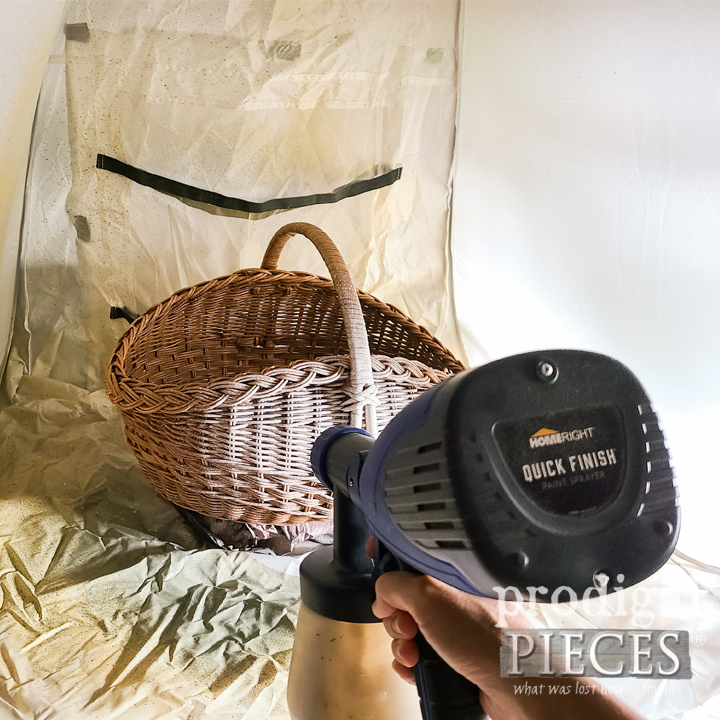
Next, I set up my Wagner Spray Shelter with my Turn Table and set up my basket inside. Then, I fill the canister of my Quick Finish Sprayer with the whitewash. You can see how I’ve used this wonderfully, easy-to-use sprayer in this video tutorial HERE or in these past projects.

Step 4
Once I start spraying, I’m done in 5 minutes. No kidding! My goal is to only tone down the wood of the basket so a light coat is all that’s needed. I begin spraying before I hit the basket and continue spraying until off so that I have nice, even coverage.
Step 5
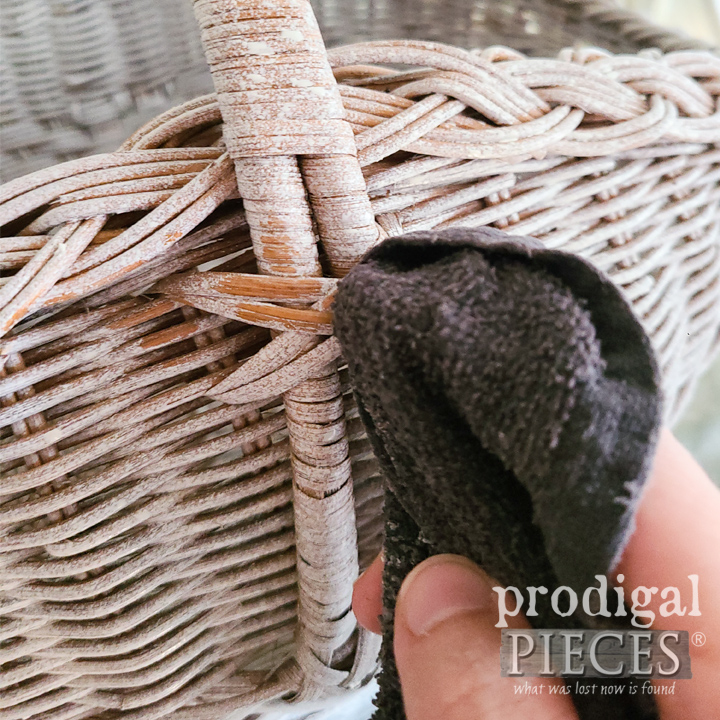
However, before I call my basket done, I gently wipe away any whitewash that I want a bit of wood to show with a damp cloth. Highlighting certain design details really give it texture.
Step 6
One last thing, we have to clean up our sprayer! Thankfully, it’s a breeze with the Quick Connect/Release feature. Just pop it off and rinse with warm water.
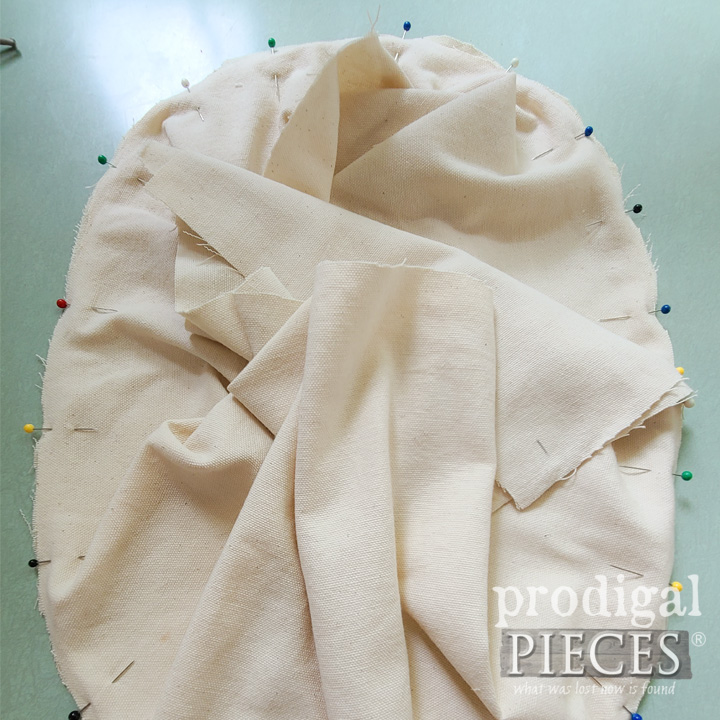
Step 7
Before I call this basket complete, however, I want to add a few more features to cozy it up. A fabric lining makes it have the extra touch. Since each basket is different, the basic idea is to trace the shape of the bottom, then measure the height and circumference of the side. Cut the fabric and assemble. I’m making mine to be glued in, but you could make a liner by using a finished edge and ties.
Step 8
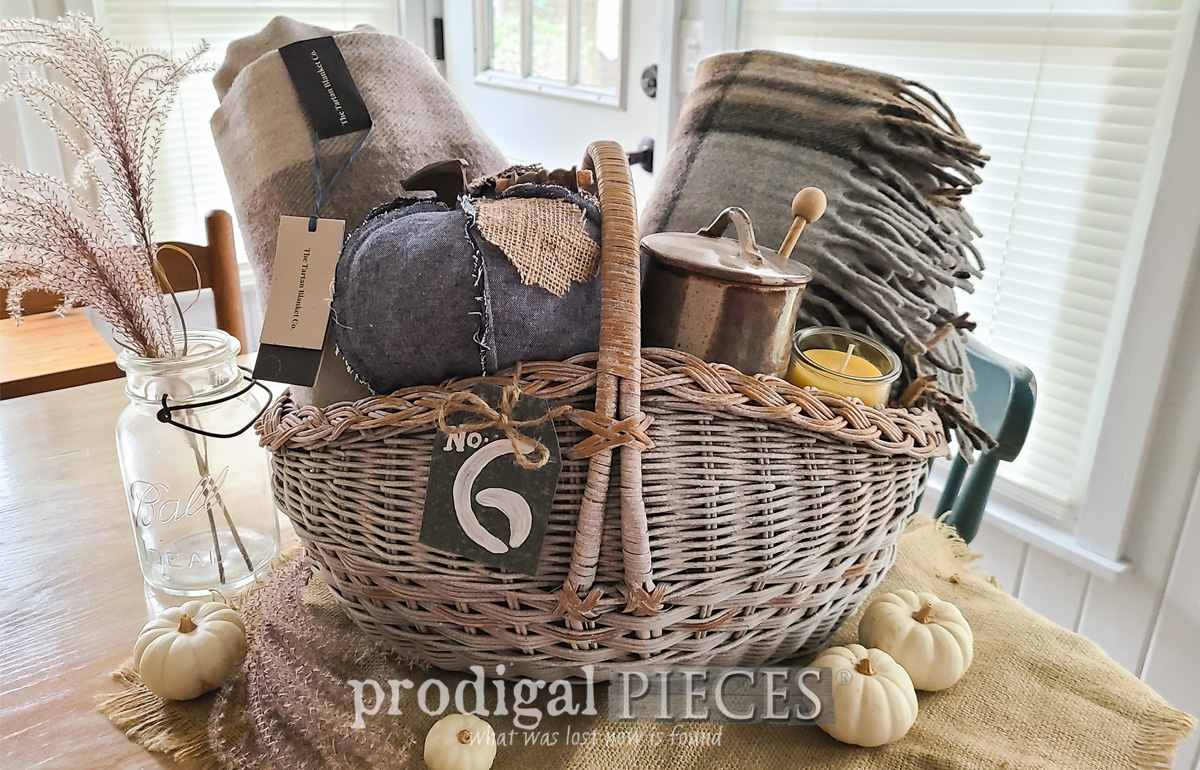
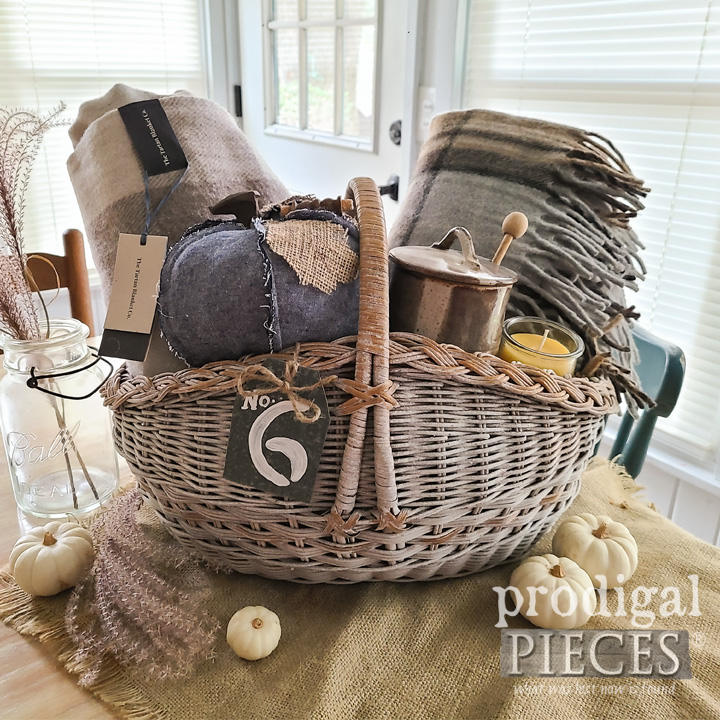
Finally, it’s time for filling our harvest gift basket. Do note that this basket idea is perfect for any reason, holiday, or season. Here’s a peek at the lining inside. Much better, right?

Step 9
Also, I’m all about cozy this time of year, so I pick out a couple of woolen blankets, a homemade beeswax candle, a honey pot by a local artisan, and a reclaimed pumpkin I’ve created from my shop. Oh, and I also added a fun No. 6 tag I cut from an old vent from our kitchen remodel. It’s now filled with love and ready for giving. What would you fill the basket with?
This sponsored post was created by Prodigal Pieces. My goal is to inspire you to take the obvious and make it special…make it your own. If you want to inspire others, do pin and share too. In addition, I’d love for you to come visit me on my blog, Prodigal Pieces to see what else I’m up to each week. Give DIY a try and make your house your home. Until next time!
Download project steps & shopping list
We'll never share your email with anyone else.