Create a Faux Brick Overmantel
Learn how to paint a faux brick over-mantle to create a cozier look above your fireplace and complete your living room area.
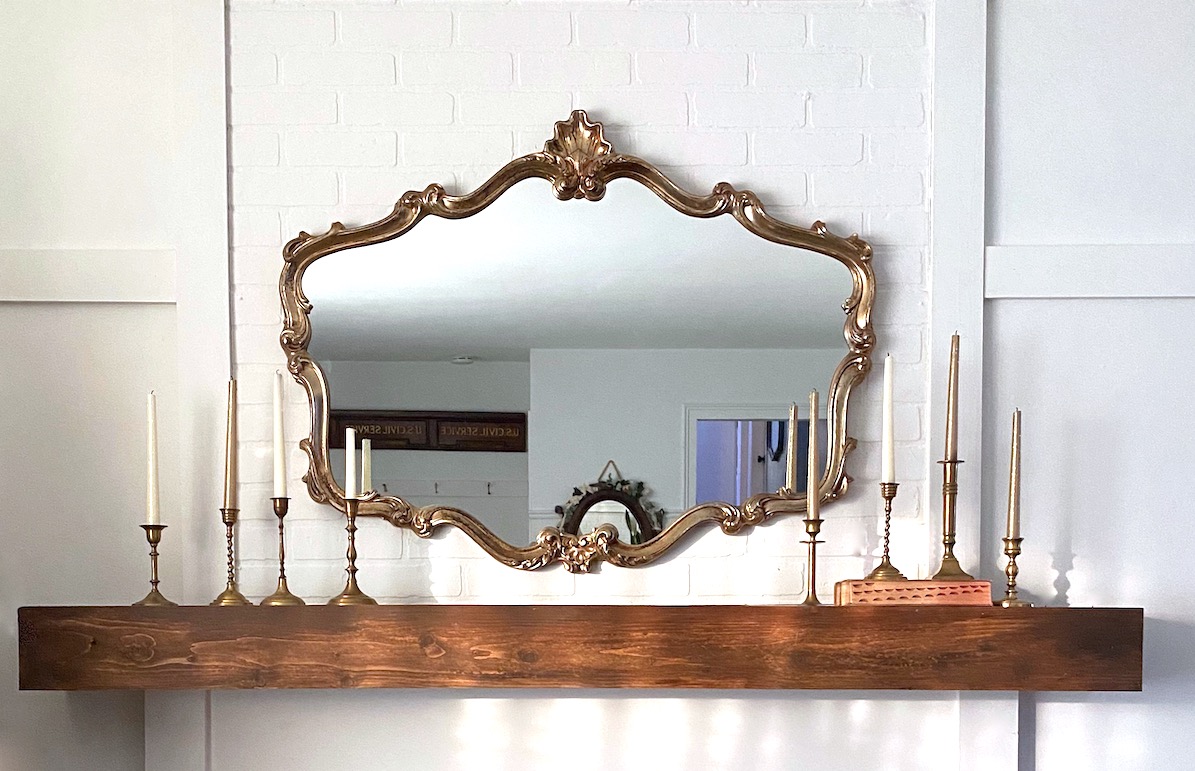
We live in a cozy 1960’s split-level home. One thing I dream about having one day is a working, wood burning fireplace. I decided since that isn’t something we can’t install right now, we decide to add a pretty fireplace mantel. A few years ago, I found a really awesome antique mantel that we installed on our main wall. Over time, it’s slowly evolved, and a few months ago, we built a DIY faux box beam mantel over the existing one to give it a fresh look. I wanted to finish off the area of wall above it, called an “overmantel”, and faux brick paneling was a really affordable, and easy way to do it ( it was only about $40!).
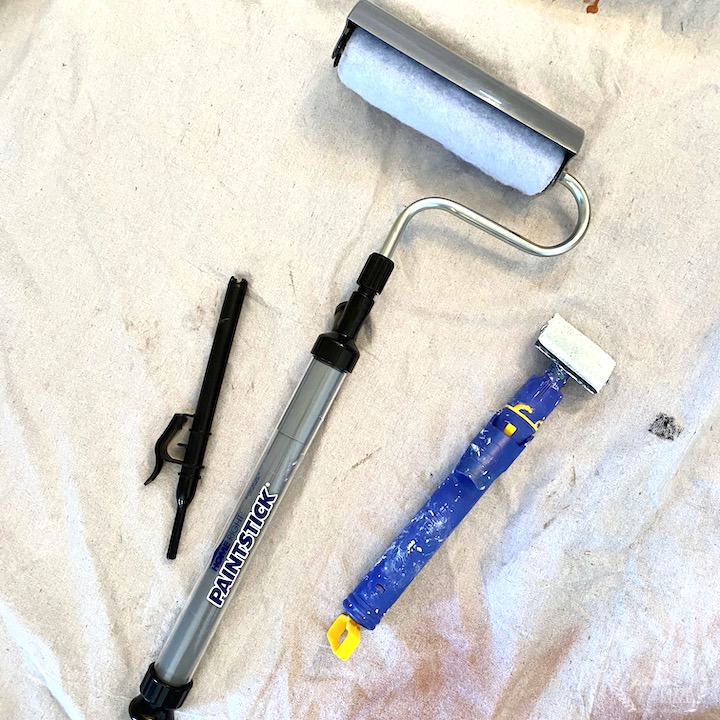
Below is the step by step for creating your own overmantel, supplies, and using the PaintStick EZ-Twist Paint Roller, and the Quick Painter Pad Edge Painter to easily paint the panel without any dripping, mess, or excess paint waste.
Supplies:
- HomeRight PaintStick EZ-Twist
- HomeRight QuickPainter
- 2” angled paint brush
- Tarps
- Faux brick paneling cut to size
- 2- 1 x 4’s cut to size
- Tape measure
- Drill
- Drywall screws
- Screw Driver
- White latex paint or paint color of choice
- 2” Metal brackets and screws to fit
- Painter’s caulk
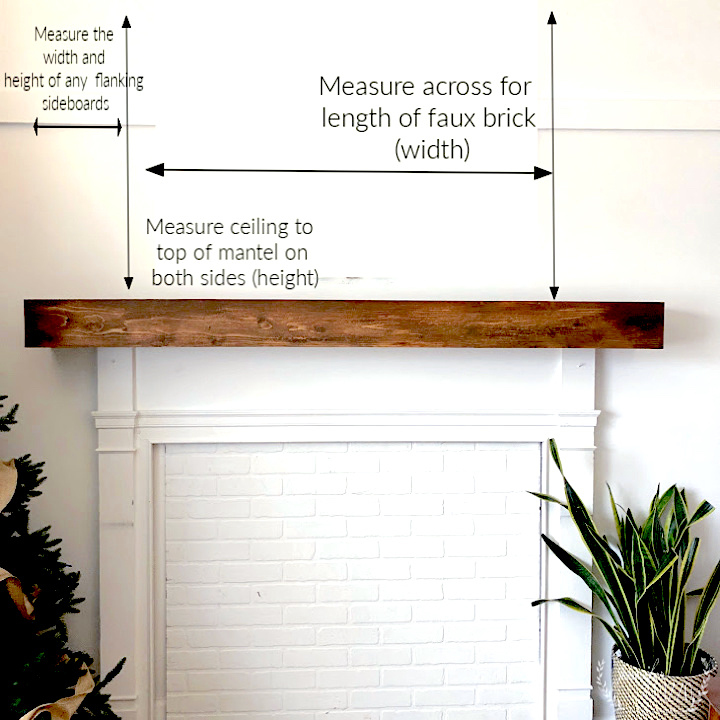
Before starting: Measure the dimension for the mantel from top of mantel to ceiling, and the desired width across. The faux brick paneling I found came in huge 4 x8 foot sheets, with a width of 48 inches. To make sure that my bricks ran in the right direction, I knew that 48 inches was the widest my mantel would go across without having two match and patch the paneling. I decided to add about another 8 inches of width with a 1 x 4 on each side. I had the home improvement store cut my paneling, and side boards and I took the rest home for future projects.
Step 1-4
(1) Once the boards are cut, do a “fit test” and set the boards in place to make sure they are the proper size. (2 + 3 ) Use brackets with screws to attach the sideboards to the underside of paneling. You may have to purchase smaller screws than the ones that come with the brackets, depending on the thickness of your lumber and paneling. These aren’t for structural support, or anything weight-baring, they are only to hold the boards in place. Since there was a size difference between the boards and the paneling, we found it helpful to place another board underneath the paneling to make them the same height. (4) Once secured, do one more “fit test” to make sure your panel fits. We had to remove some previous trim to fit the faux brick panel in place on our wall.
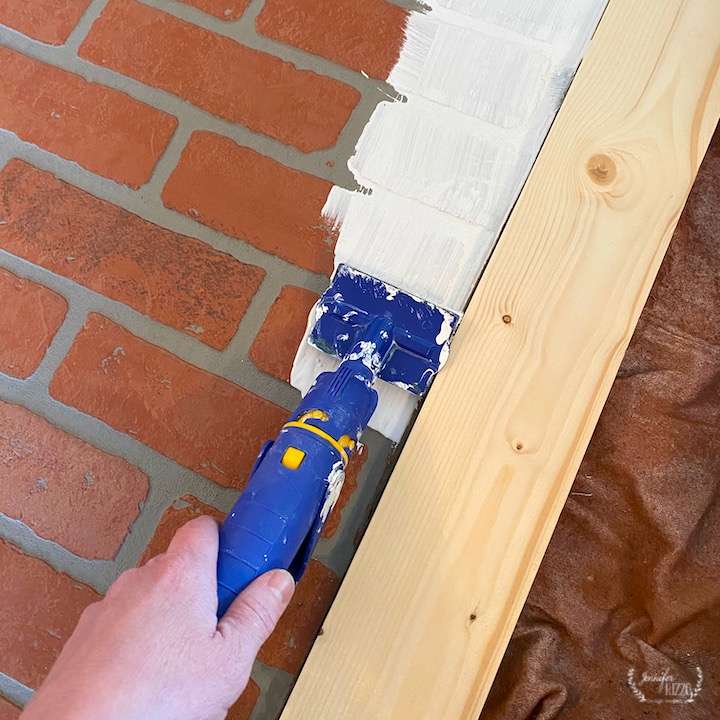
Step 5
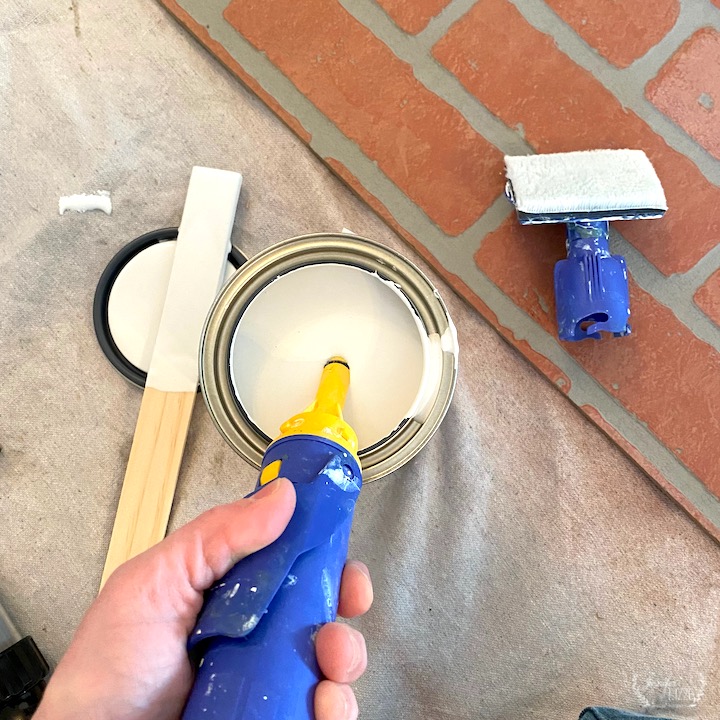
Carefully remove the panel and place on a tarp to paint. I picked the same white paint color as my wall. Follow the directions on the QuickPainter to load the paint.
Step 6
Use the quick painter along all of the edges, and to paint the boards. Two coats may be needed.
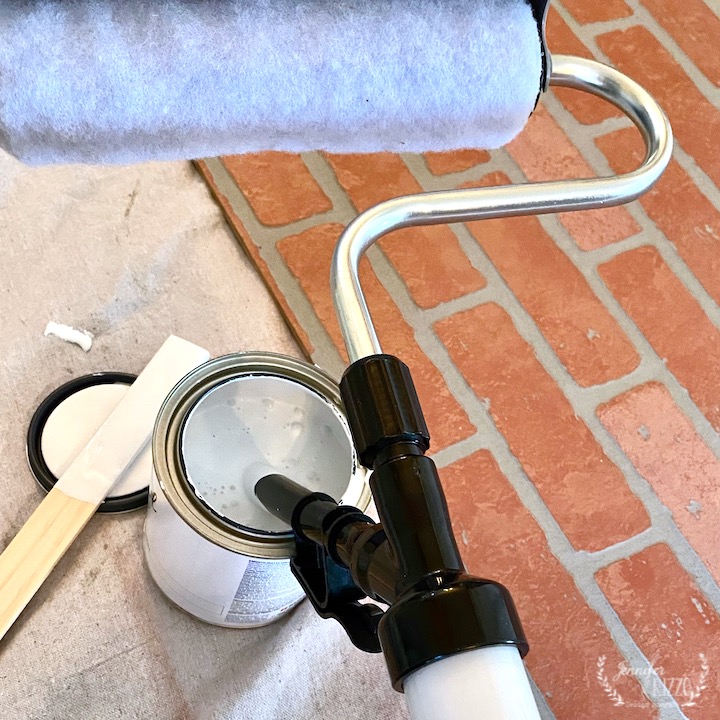
Step 7
After painting the inside and outer edges with the QuickPainter, following the directions, fill the PaintStick EZ-Twist Paint Roller with the same paint.
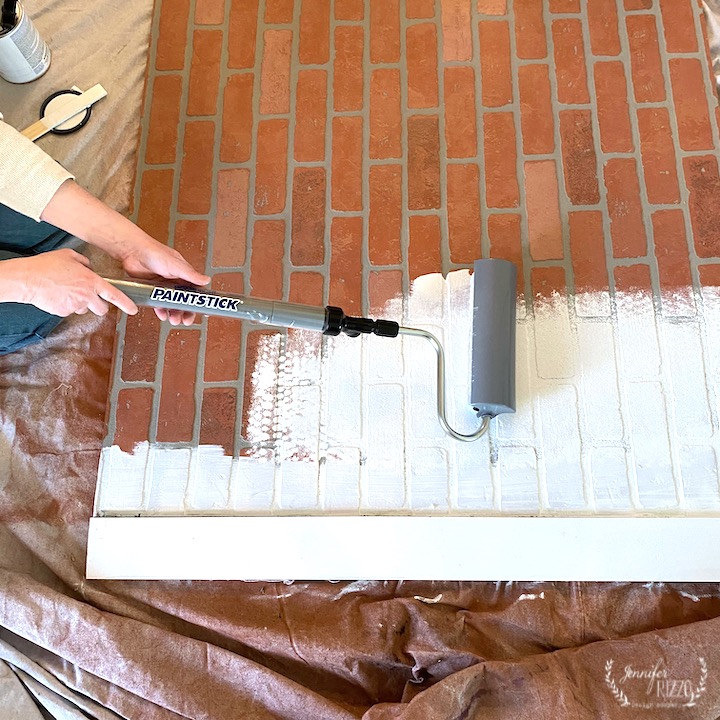
Step 8
Plunge the paint into the roller slowly to load the roller, and start painting! Just press and give it a twist as you need more paint… The paint will flow out onto the roller at you roll. So easy and neat! Roll in a classic up and down “W” pattern against the faux brick until covered with one coat, and let dry.
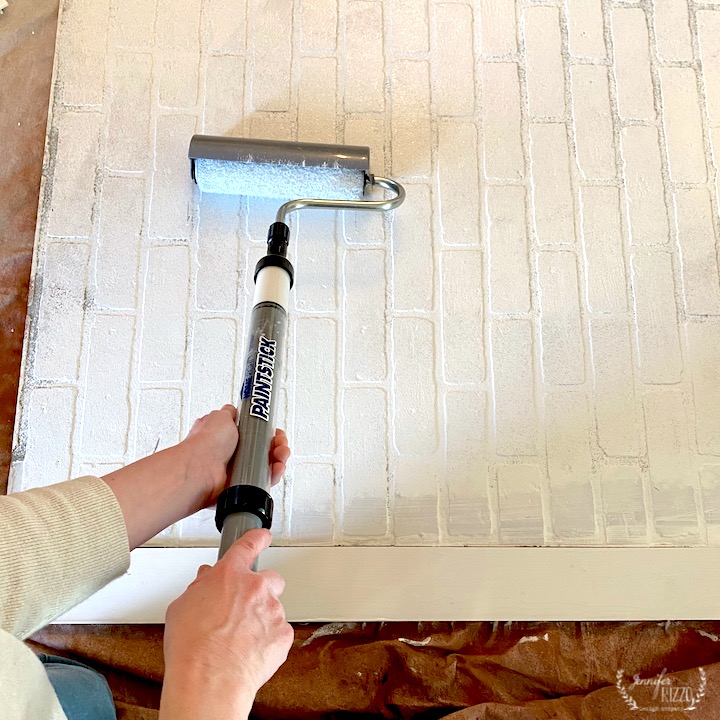
Step 9
Once coat one is dry, change direction and roll with the brick pattern to fill in the faux “mortar” lines, and any spots on the brick that were missed. Let dry flat. Squirt any remaining paint back into the can, and clean the PaintStick and QuickPainter for your next project.
Step 10
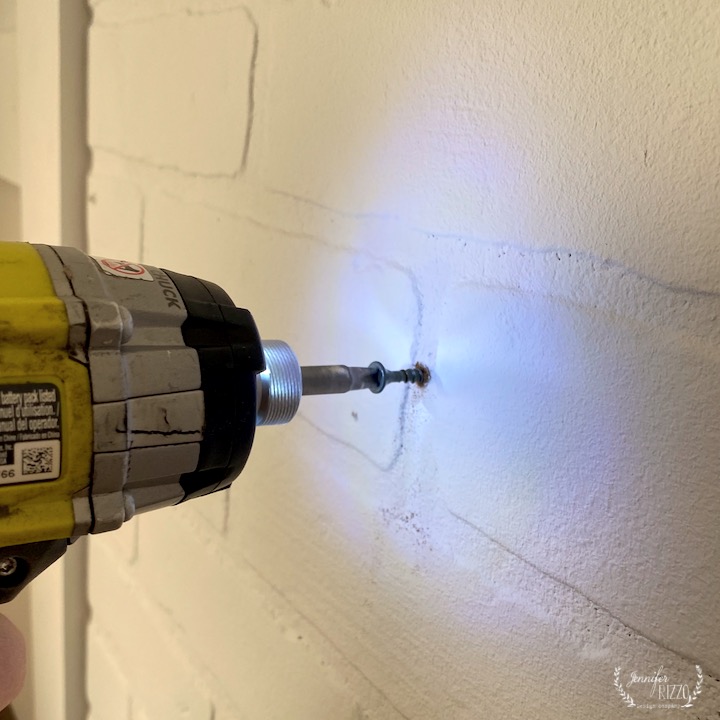
The panel may have warped slightly depending on the paint load and how it dries. It will flatten once it is screwed into the wall. Before hanging the faux brick panel, always use a stud finder and check for any underlying utilities before screwing into the wall such as plumbing or electric. Pre-drilling holes for the screws in the paneling also make it easier to hang the panel. We found that anchoring it with screws in 3-5 places helped the panel to sit flat on the wall. We also pre-drilled a hole where our mirror would hang in the center, so it could easily go right back into its previous support in the wall. This paneling is for cosmetic purposes only, so anything you hang needs to be firmly attached into the wall behind it.
Step 11
Once the panel is up, if you aren’t using white screws, add a dab of paint over the top of the screw head so it blends in with the paneling. At this time, if there are any gaps between the ceiling you can use painter’s caulk to fill and to get a nice, clean edge. Paint and let dry.
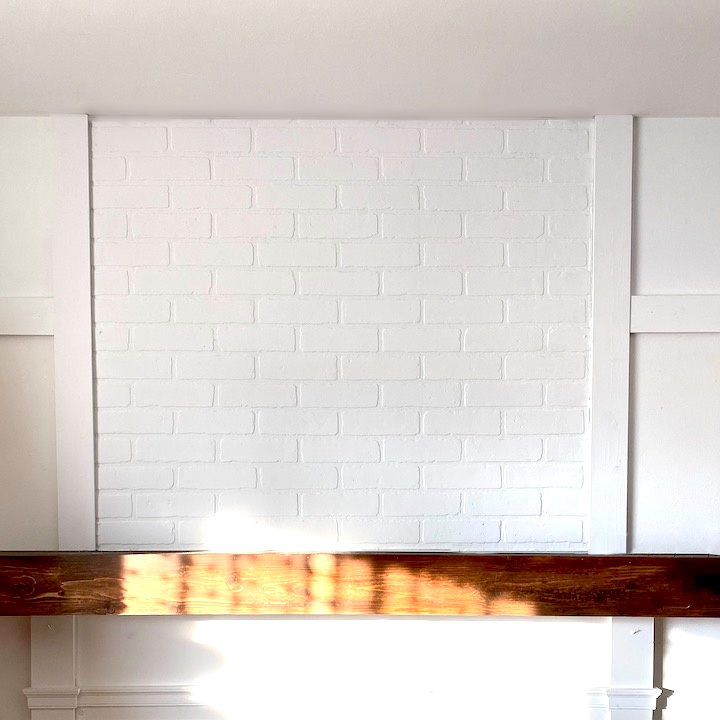
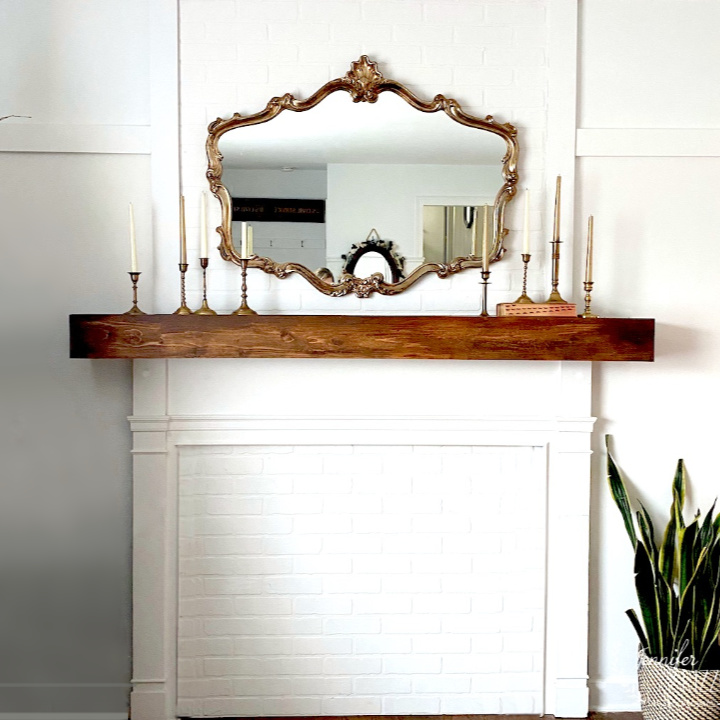
Once your faux brick overmantel panel is up and the paint dabs are dry, you’re ready to add all of the pretty stuff!!! I love how it really completes the look of mantel, and adds a classic touch. It makes it feel like it’s always been here!
For more inspired and creative home and craft ideas, you can visit my website at Jenniferrizzo.com. You can also visit our retail store and makery, The Collective lhe + Makery.
Download project steps & shopping list
We'll never share your email with anyone else.