DIY Outdoor Lantern
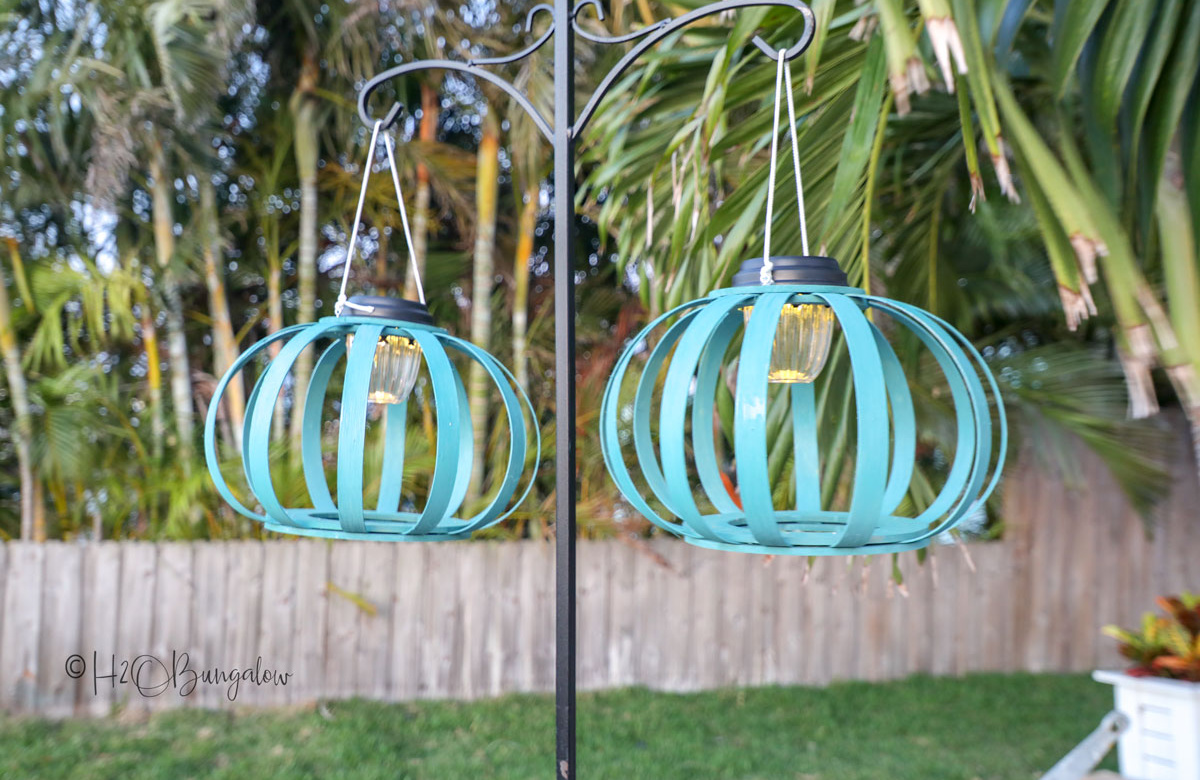
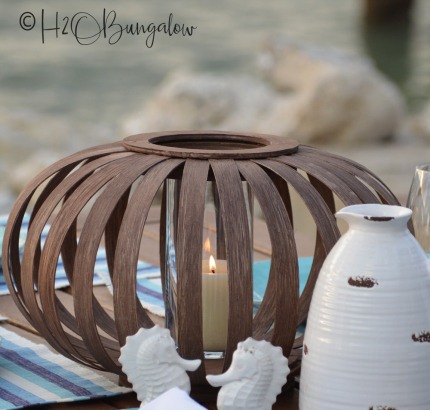
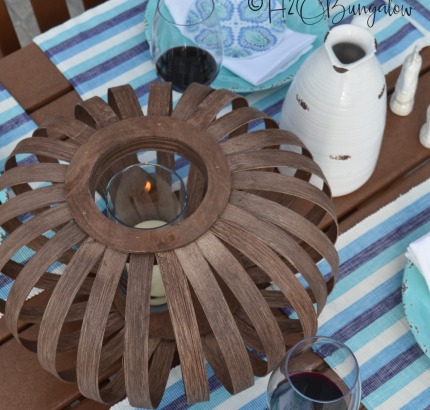
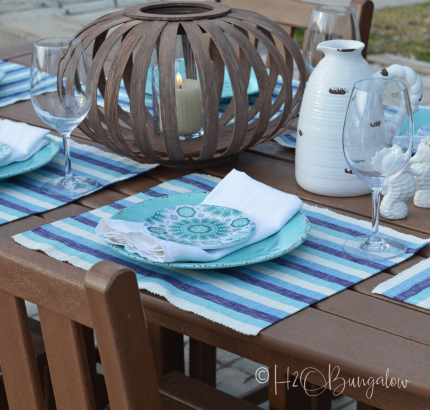
Decorate your outdoor space by creating a DIY wooden lantern this spring summer season! One of my favorite things to do is spend evenings outside with friends and family gathered around our large outdoor dining table. I whipped up this darling lantern for under $15 friends! I think it would look perfect on an outdoor picnic table, deck or patio. The wide tops fits either an LED candle or a tall glass candle holder with a candle. You can't go wrong with handmade decor!
Materials Needed:
- Super Finish Max
- Small Spray Shelter
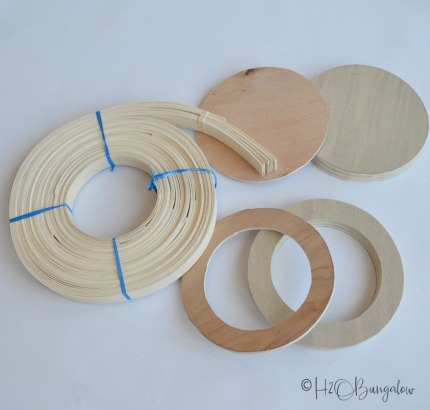
- 21 feet of 1" wood basket reed
- 3/4" Plywood
- 1/4" Plywood
- 8" scrap 2" x 4" piece of wood
- Water based stain
- Jigsaw
- Staple gun
- Brad nailer - optional
- Wood glue
- Safety googles
- Disposable gloves
- Painters rags
Project Steps:
Perfect outdoor project for lovely weather.
STEP 1:
Cut two sets of circles out of the 1/4" plywood and the 3/4" plywood with a jigsaw. I traced a 6" bread plate for the circles and found a smaller plate to trace the inside circle that was cut out. It's easy to cut the inner circle by making a hole with a drill first. Next, insert the jigsaw blade into the drill hole and cut the inner circle. Do this for one of the 1/4" and one 3/4" plywood circles.
STEP 2:
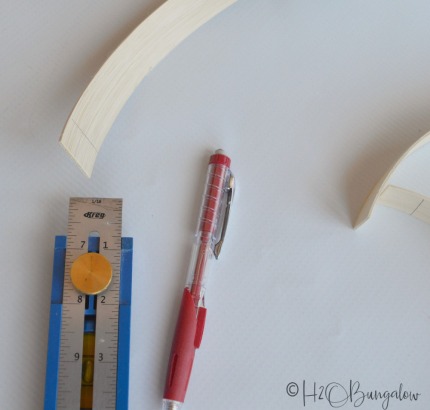
Cut 16 pieces of the wood reed at 15" with scissors.

Step 3:
Mark 3/4" from the end at one end of each wood reed. Turn the reed strip over and also mark the oposite end at 3/4".
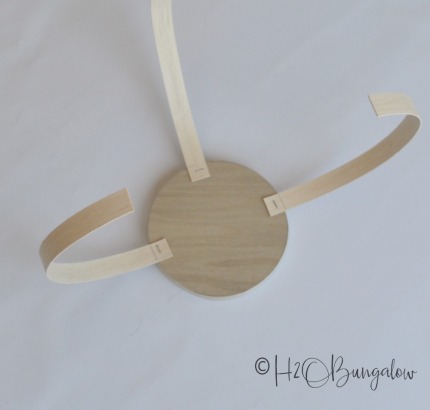
STEP 4:
Start with the 3/4" plywood solid circle. Place the 3/4" pencil mark on the edge of the circle and atach four reeds with the staple gun at 1/4 circle intervals.
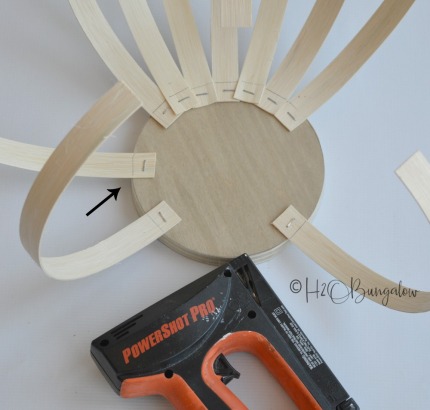
STEP 5:
Attach another reed in the center between each of the first four reeds. See the arrow below. Fill in each of the last of the spaces with two reeds. They will overlap slightly.
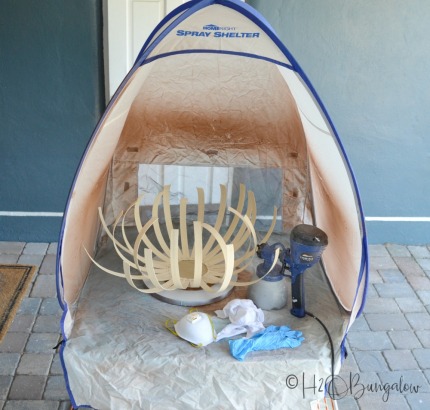
STEP 6:
Use the Small Spray Shelter and Super Finish Max with the blue tip to stain the lantern, the base and top circles on all sides. I found it easier to stain the underside of the lantern first, wipe off the excess stain with a clean painter's rag, flip over and spray the inside last. Be sure to wear gloves and use your safety equipment.
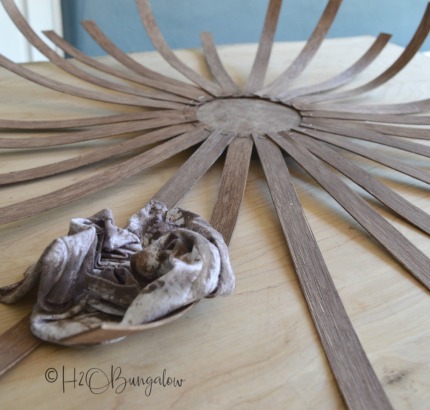
STEP 7:
Gently wipe off the excess stain from all sides of the lantern front and back. Set aside to dry.
STEP 8:
Use wood glue to attach the 1/4" solid circle onto the lantern base. Secure with a few 1/2" brad nails or a few staples.
STEP 9:
Use an 8" piece of 2" x 4" as support to attach the reeds to the top of the 3/4" cut out circle with the staple gun. Follow the same pattern as when you attached the bottom reeds using your pencil line as a guide.

STEP 10:
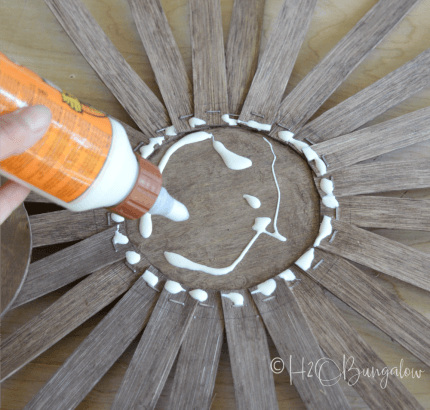
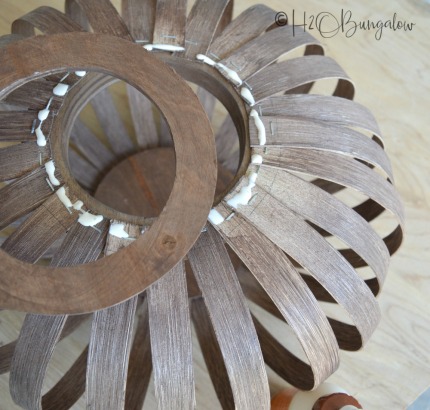
Use wood glue and brad nails or staples to attach the 1/4" plywood circle onto the top of the lantern.
STEP 11:
Place a tall glass candle holder inside the center with a candle.
STEP 12:
If you enjoyed this project, please visit my blog for even more home decor and home imprvement DIY! You'll find me at H2OBungalow. My job is to inspire you to create a style in your home that's true to you. I'm a DIY'er through and through. I share hundreds of tutorials in home improvement and home décor on my blog that will help you create a home you love without breaking the bank.
Download project steps & shopping list
We'll never share your email with anyone else.