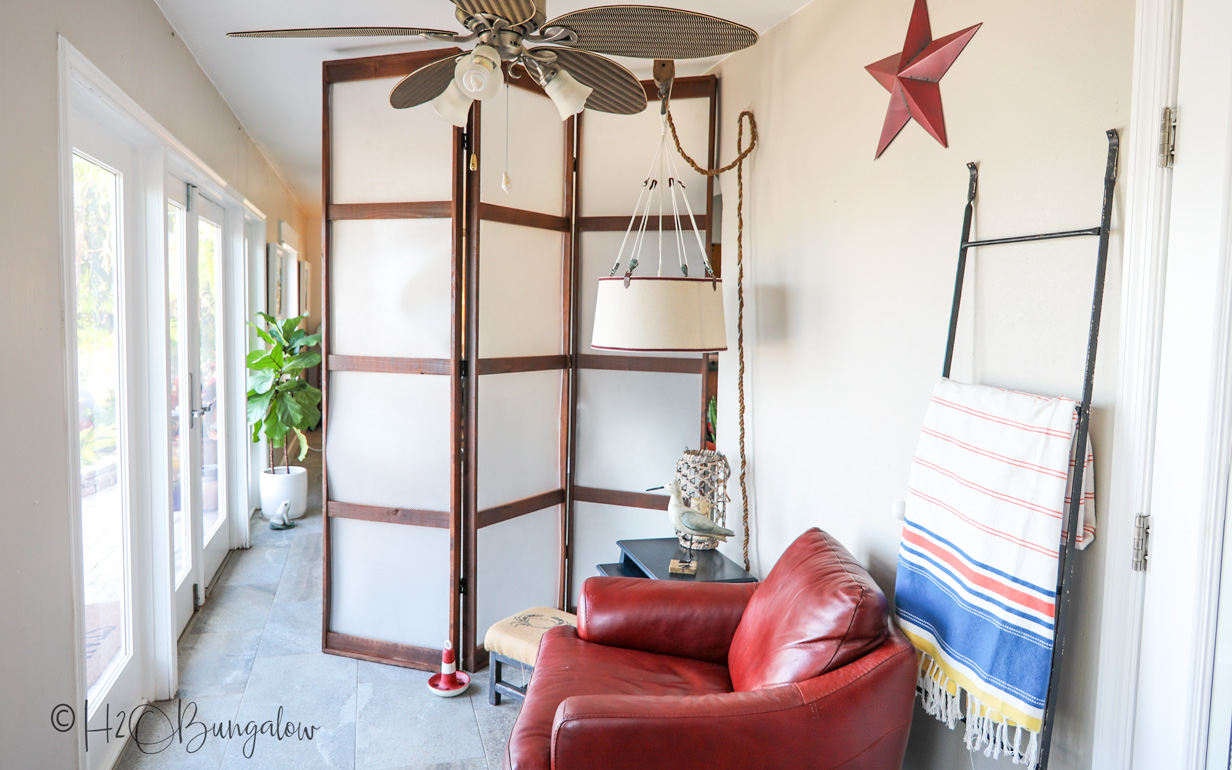
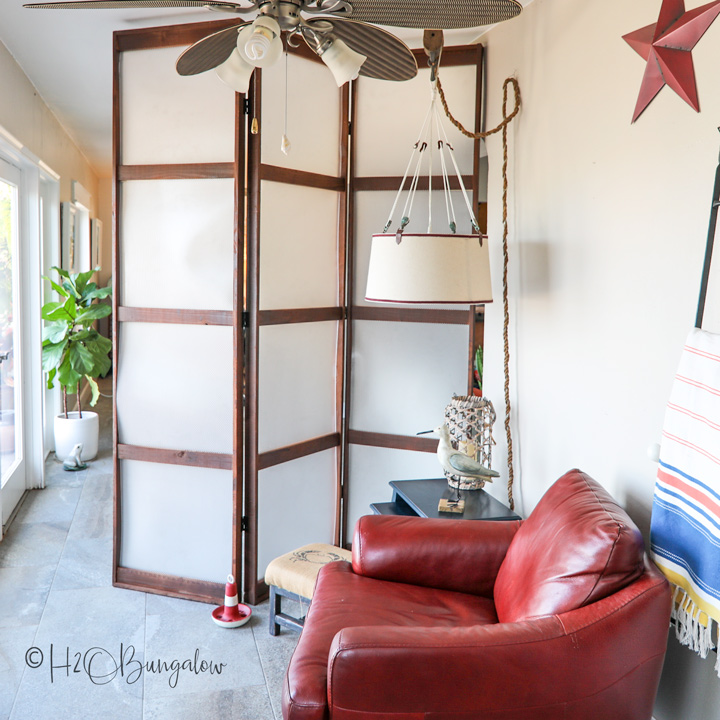
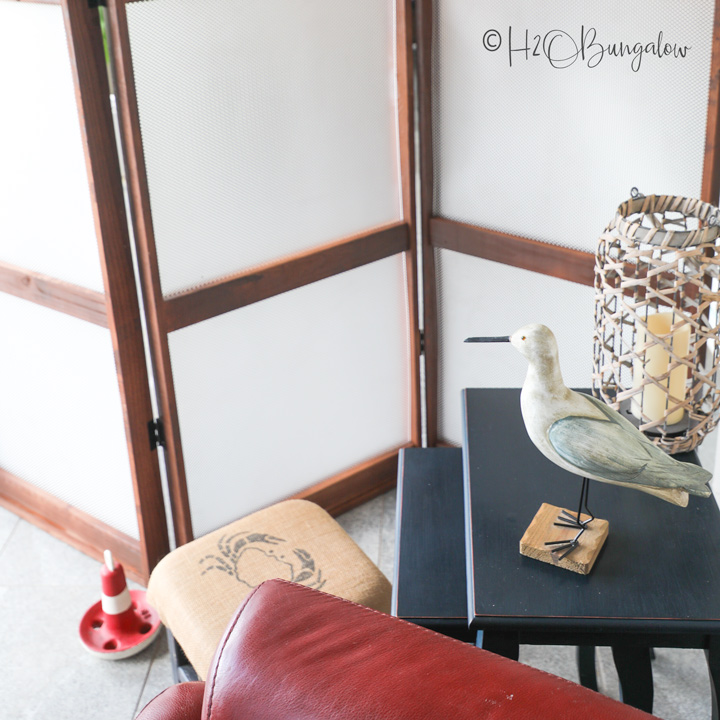
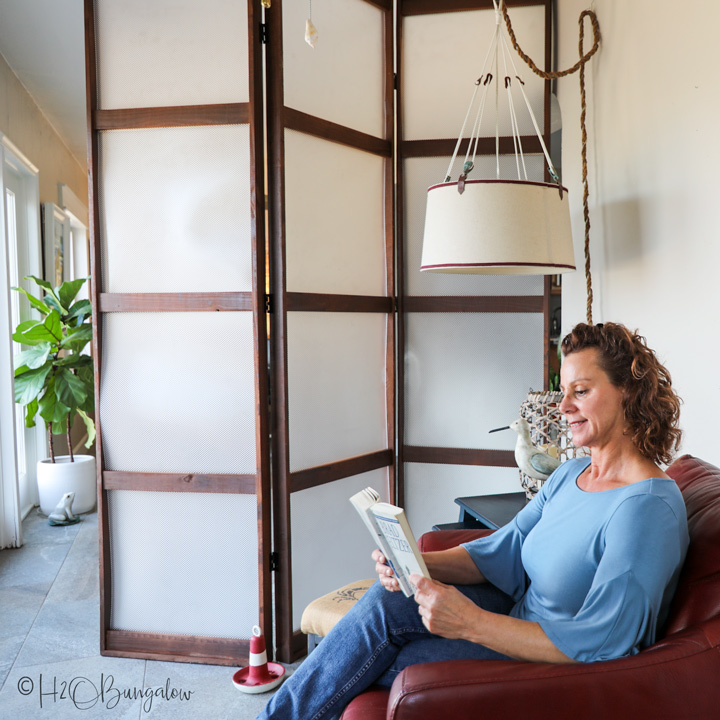
DIY Three Panel Room Divider
Learn how to create a simple three panel room divider to provide privacy, but plenty of light filtration, in your living space.
Hi I’m Wendi from H2oBungalow.com. Today I’m going to share with you how to build a three panel room divider that’s easy to move, provides privacy and still lets lots of light shine through.
Because seeing is often much easier than just reading about a project, I’ve made an informative video tutorial covering all of the steps in detail which you can see below. If you’d also like to download the step by step instructions you can find them in my blog post at H2obungalow.com.
Supplies needed to make a custom room divider.
- 9 - 1" x 3" pine boards @ 8 feet
- 6 - 22 1/16" x 46 1/4" transparent acrylic lighting panels
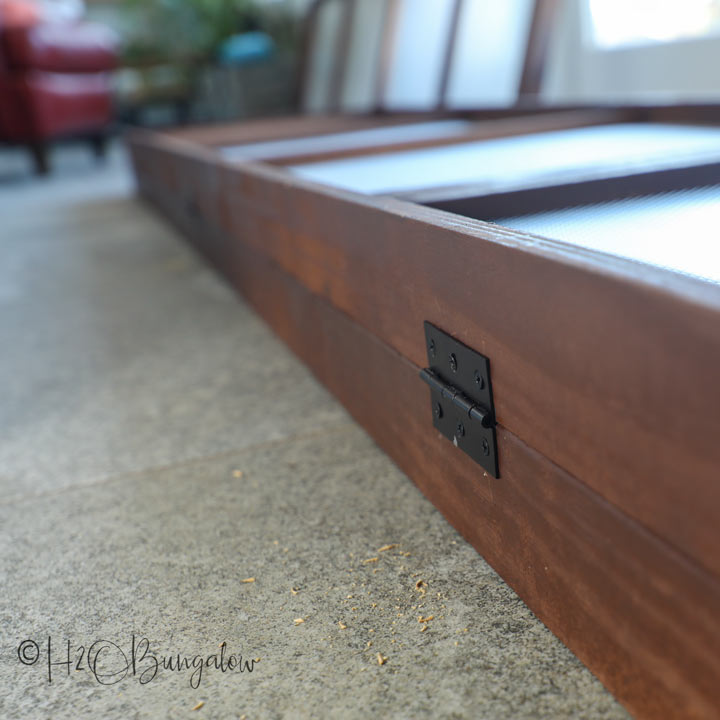
- 6 - 3 1/2" hinges
- Dark brown paint or stain
- HomeRight Super Finish Max Paint Sprayer
- Extra Super Finish Max paint containers
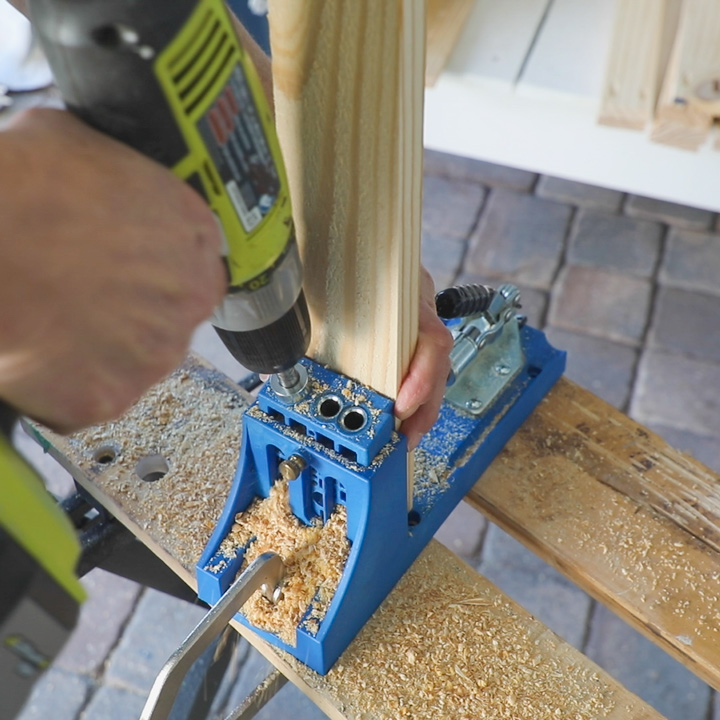
- Kreg Jig - K4
- Pocket screws 1 1/4"
- Drill
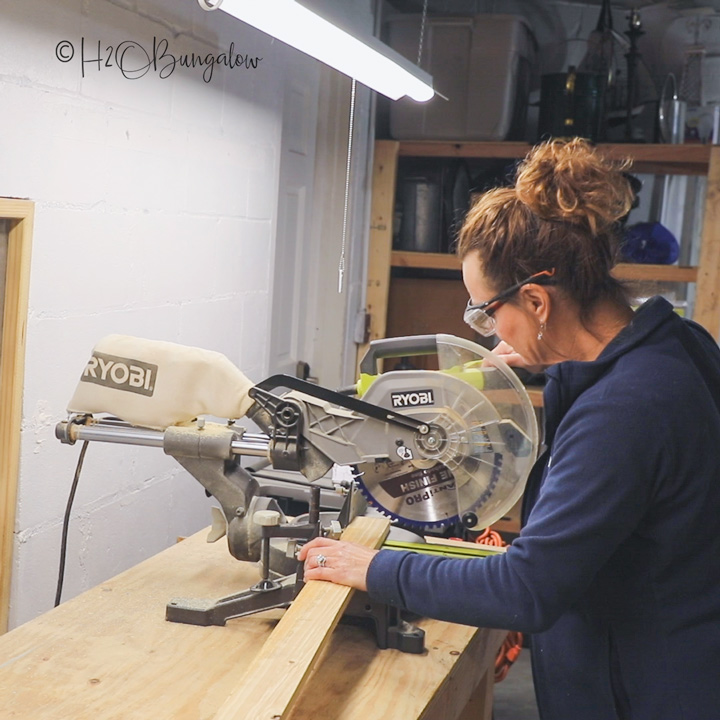
- Miter saw
- Sander
- Tape measure - this self centering one is a favorite
- Safety goggles that fit over prescription glasses
- Dust Mask
Step 1: Cut lumber to size per the cut list below.
Cut list:
6 - 1 x 3” @ 94 ¼”
36 - 1” x 3” @ 22 ¼”
Step 2: Add Pocket Holes
Set the Kreg jig to ¾” and add two pocket holes to the end of each of the 22 ¼” board lengths.
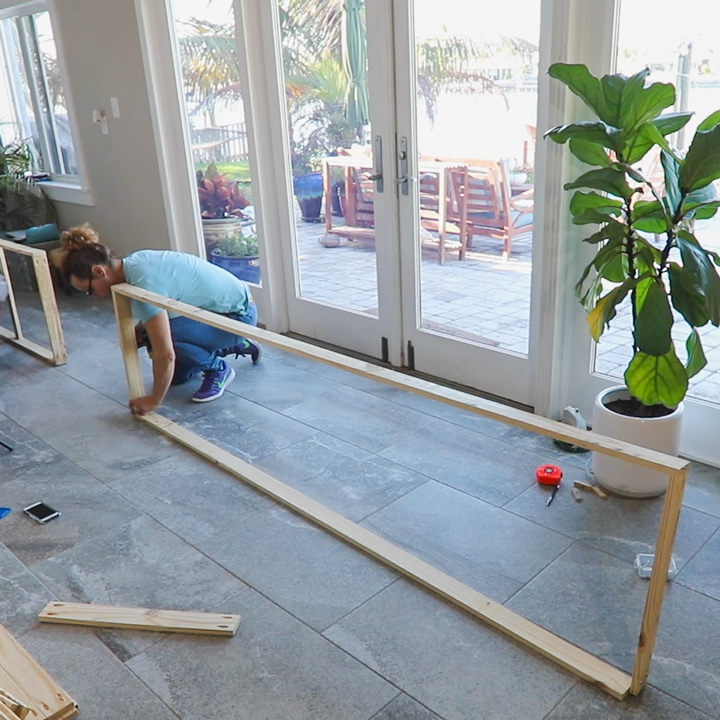
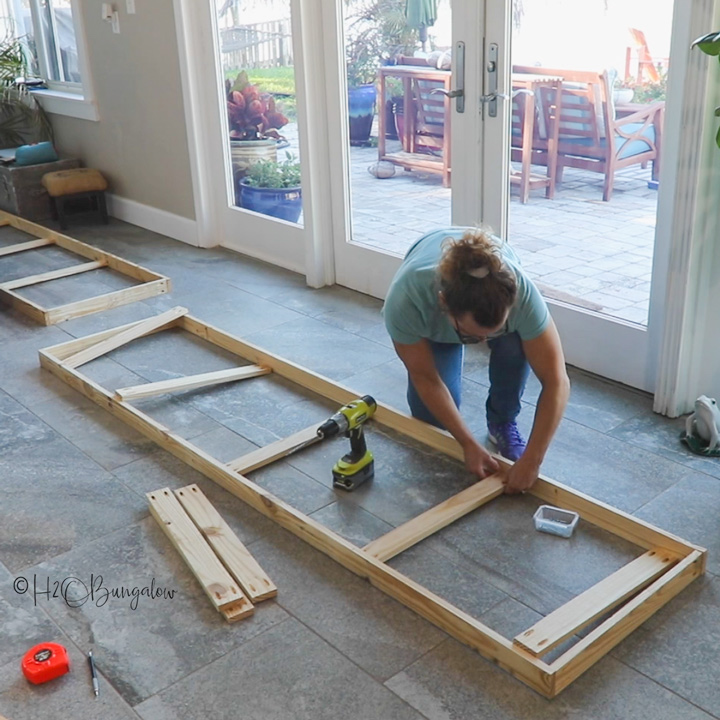
Step 3: Assemble the outside frame of the first panel next.
Start by placing two long stiles and two short rail pieces on a flat surface. My workshop is really small so the best place for me to assemble the frames was on the floor in my house.
Position the top and bottom rail so the pocket holes face outward. Attach with 1 ¼” pocket screws.
Step 4: Next, lay the frame flat on the floor.
Add 5 rails to one side. Measure and mark the location of the rails. Mark 23” from each end and 46”, which is the center. Line up and attach the rails with 1 ¼” pocket screws.
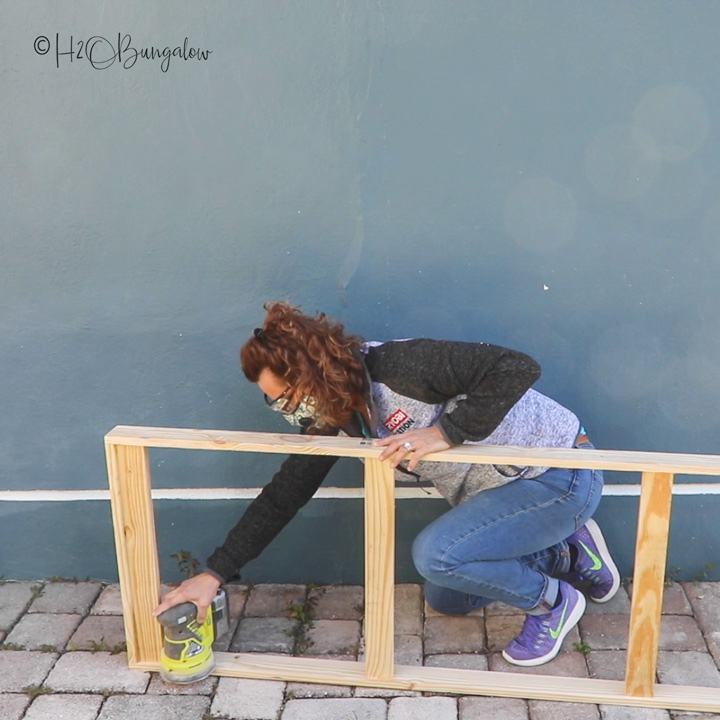
Step 5: Sand
Sand rough spots on the frame and unattached rails. Add micro bevels on any sharp edge along the outside of the frame.
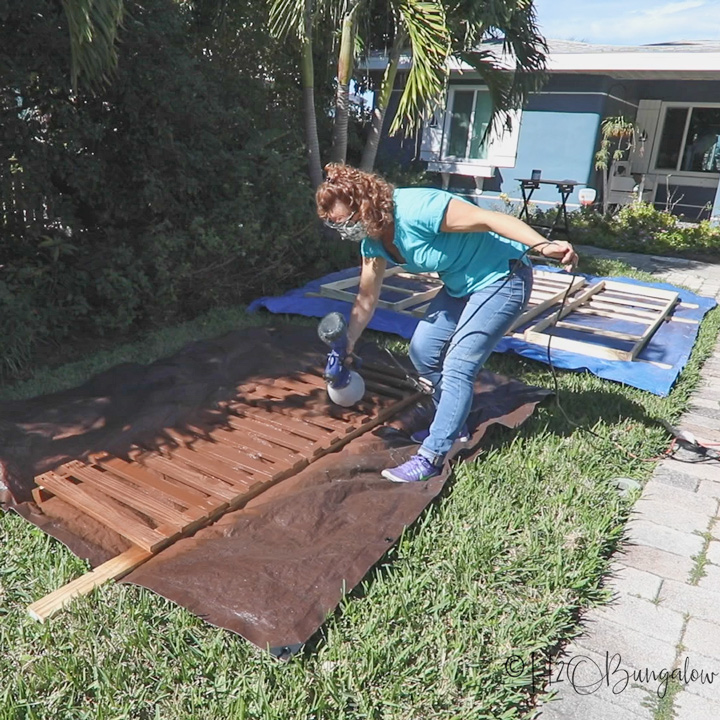
Step 6: Assemble and Paint
Paint the assembled frame and the extra rails with a Super Finish Max paint sprayer. To get a good finish you’ll need to elevate the frames and rails on 2 x 4’s. Place a drop cloth underneath to catch excess paint.
To paint the rails, apply the paint in steady back and forth motion on an angle from one side and then do another pass from the other side.
Paint the frame the same way applying the paint at an angle from one side and then to the other holding the Finish Max about 12-15 inches from the frame.
Between coats of paint, swap the Finish Max container holding the paint for one with clean water. Run the paint sprayer until it runs clear.
When the first side is dry, flip the frames over and paint the other sides.
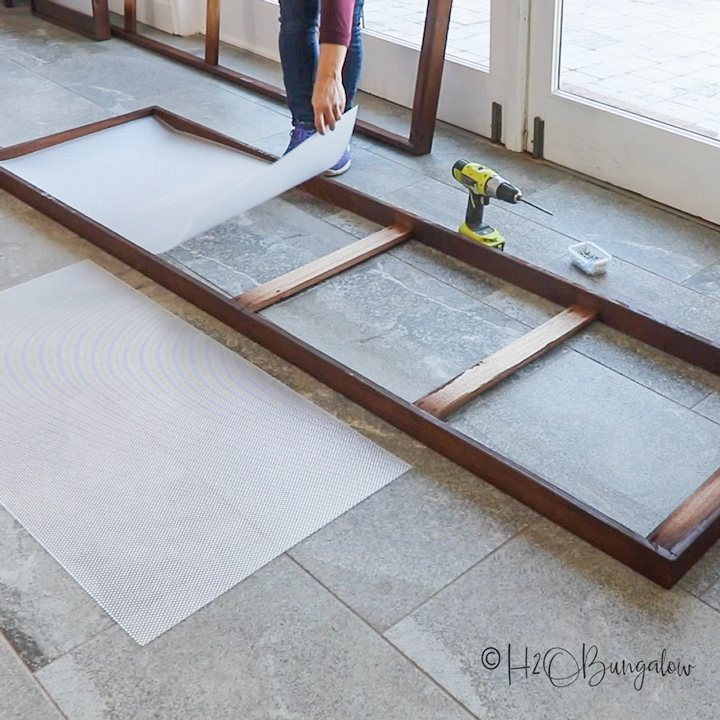
Step 7: Finish assembling the panels
Lay a panel frame front side down on a flat surface. Carefully place one clear plastic panel in the frame starting at the end. These panels crack when bent too far so lay them in place carefully.
Next, add the first two rails in the same position as the front attaching them with 1 ¼” pocket screws. The clear plastic panel will be sandwiched between the rails.
Add the next clear panel to the other end and attach those rails, finishing with the center rail which holds the two panel ends down.
Step 8: Add hinges
Place two panels with the fronts facing each other. Attach the panels together by adding three hinges to each side of the first two panels.
Now, lay the third panel with the front facing up. Add three hinges to that side connecting the middle and the top panel.
This privacy screen is budget friendly and easy to make with just a few simple cuts. Using my HomeRight Super Finish Max paint sprayer was a huge timesaver and it gave me a perfectly even finish without brush strokes.
Looking for more DIY projects to use your HomeRight products on? You’ll find lots of different types of home decor and home improvement project tutorials using a HomeRight Super Finish Max paint sprayer on my blog at H2OBungalow.com
This sponsored project was created by H2O Bungalow. Head to the blog for the full post and details.
Download project steps & shopping list
We'll never share your email with anyone else.