Farmhouse Table Makeover
Learn how to paint and update an outdated, old dining room set by applying a fresh coat of paint with a HomeRight paint sprayer.
Are you ready for some furniture makeover fun? One of the most asked questions I get is how to create my own home story on a budget. There is no easy answer other than pull up your sleeves and get it done DIY style. Plus, you don’t have to have experience, just a willing spirit. There are oodles of bloggers like myself who share their skills and know-how so you can learn too. Today, I’m taking this left-behind dining table set and giving it new life. Let’s see how straight-forward it can be.
Step 1:
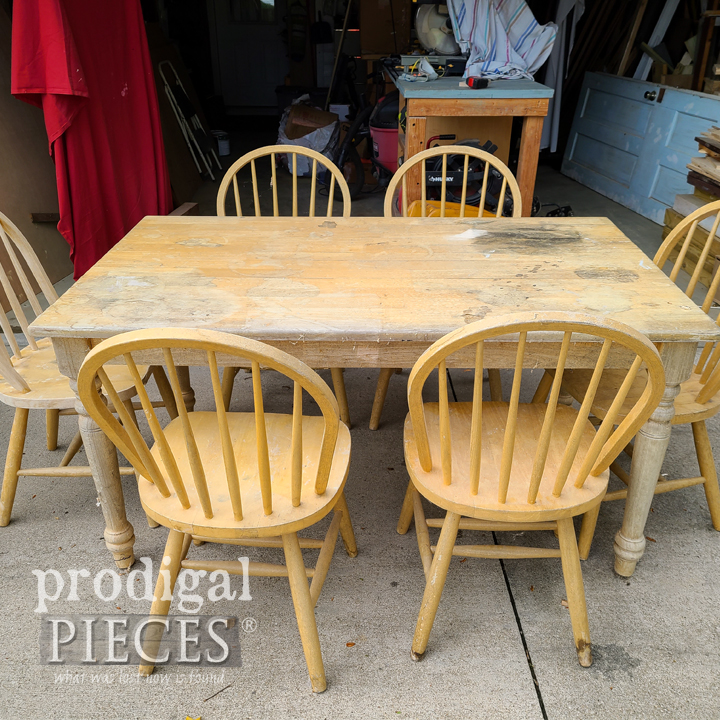
First, let’s take a closer look at this dining set. It has definitely been left outside in the weather for some time. The wood is parched, there are water stains on the top of the table, and also water damage on the feet of the chairs. Also the finish is flaking off in most places. My neighbor set it out for city clean-up and knew someone would take it. Game on! All it needs TLC the right way to revive it.
Step 2:
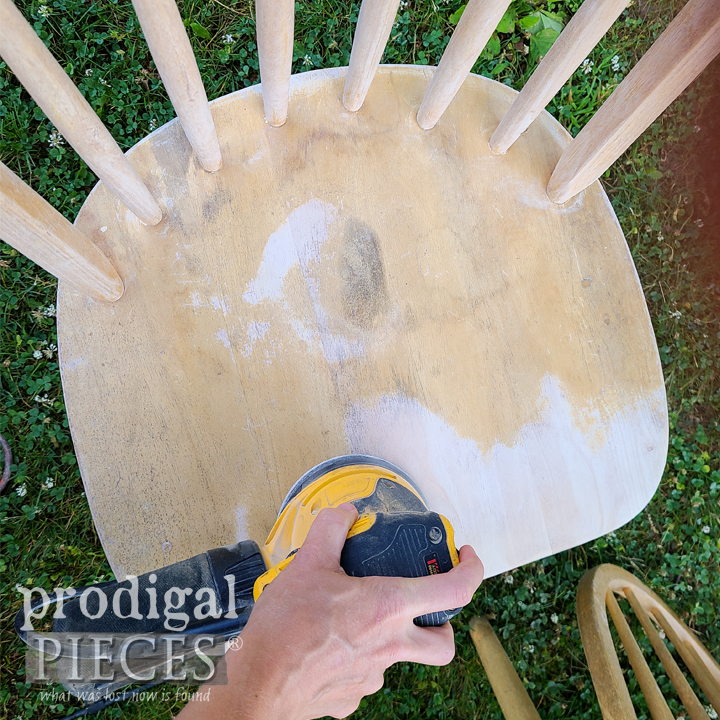
After I assess the issues at hand, I begin by breaking out my orbital sander. This will help me knock out the main portions of the chair. However, there will still need to be hand-sanding for the tight spots and spindles. My kids are eager to help and jump in to lend a hand.
Step 3:
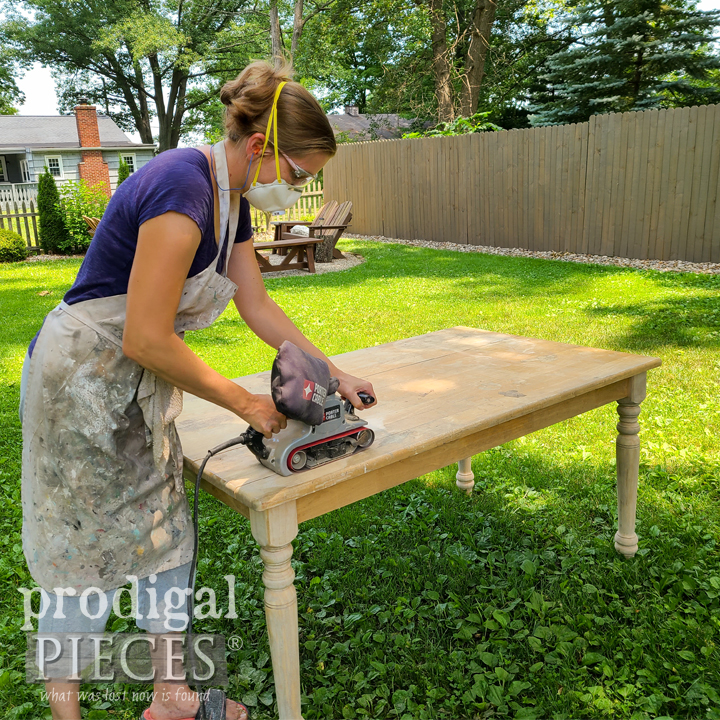
Next, I use my belt sander to quickly take off the muck that you can see on the dining table. The wood has been damaged by sun, water, and chemicals, so this is just a preparatory step for paint. This sander is heavy-duty and does the job quickly. I begin with an 80-grit paper, then follow up with 150-grit.
Step 4:
Then, after a wipe down with a tack cloth to make sure it’s lint free and ready for paint. Let’s have some fun! There is no other way I would tackle such a job than with my Super Finish Max Sprayer. It allows me to easily tackle spindles, legs, and all surfaces. Plus it has the capability to easily switch from paint to poly. The bonus is that it comes with a set of different sized tips making that transition even easier if need be.
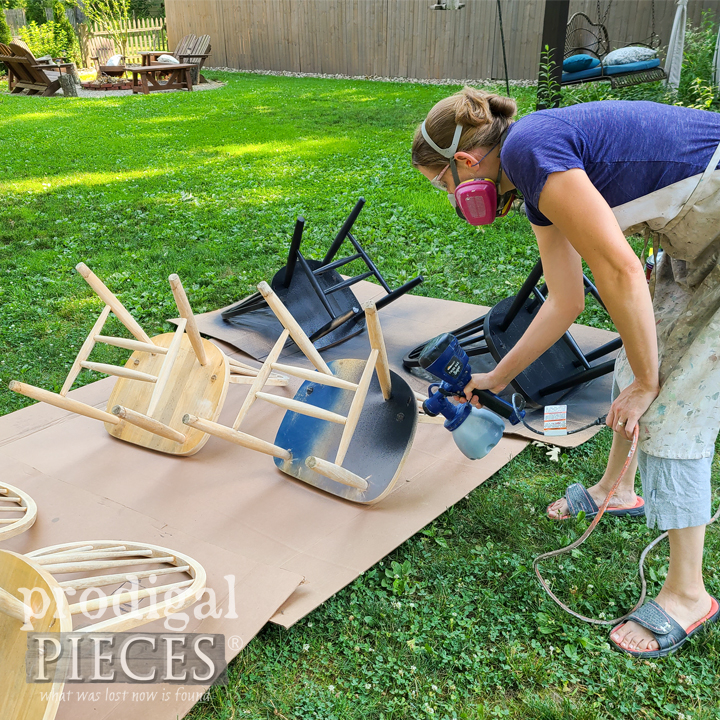
Step 5:
After I prep my area, I simply fill up the canister with a classic black paint in eggshell finish. Then, I test the flow control on scrap. The adjustable nozzle allows you to switch from horizontal to vertical spray with the flick of your wrist. If you like, you can take a peek how to set it up in my video demo HERE.
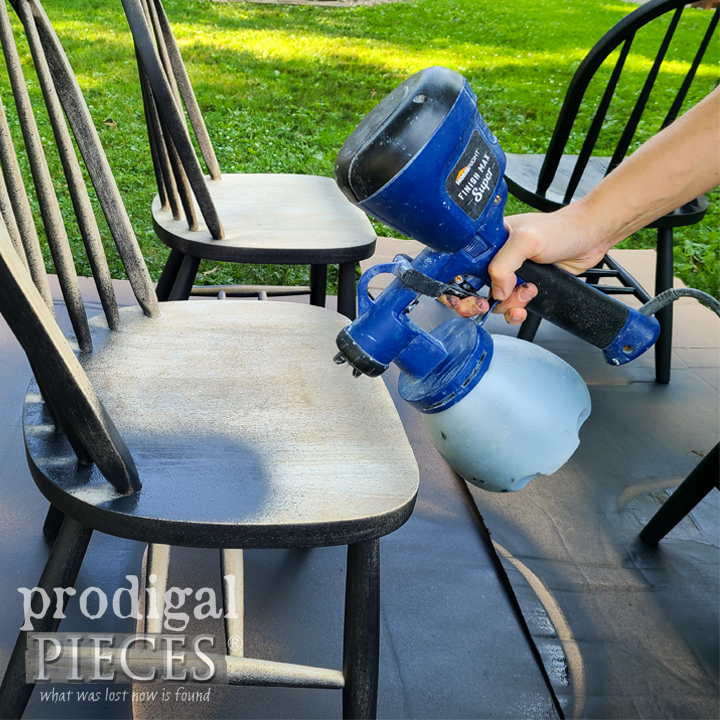
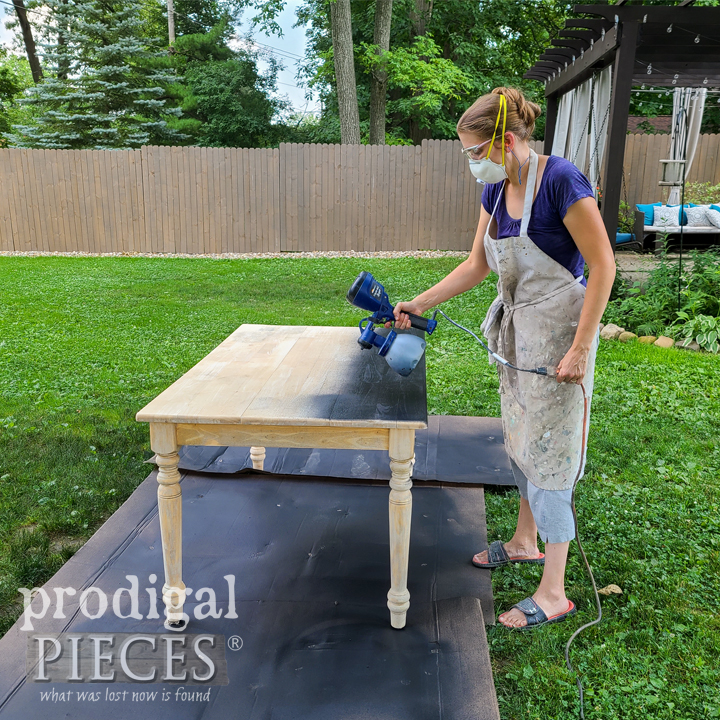
Step 6:
After the chairs have their first coat of paint, they are set to cure. Next, I begin spraying the table as well. Do note that each layer needs two hours of cure time to fully set. However, the awesome thing is that I only need 2 coats of paint. Last, I follow up with two coats of satin poly on the chairs and table base, while the table top receives 3 coats for longevity.
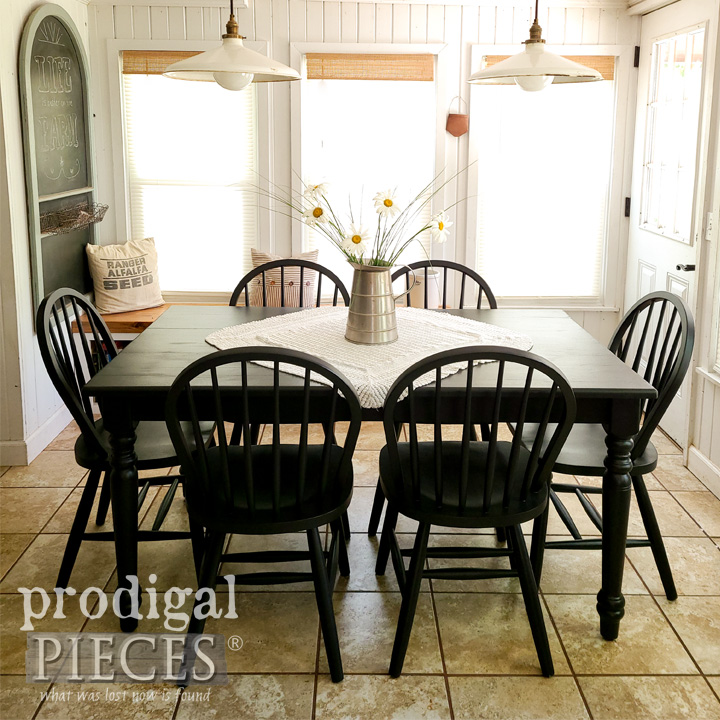
Step 7:
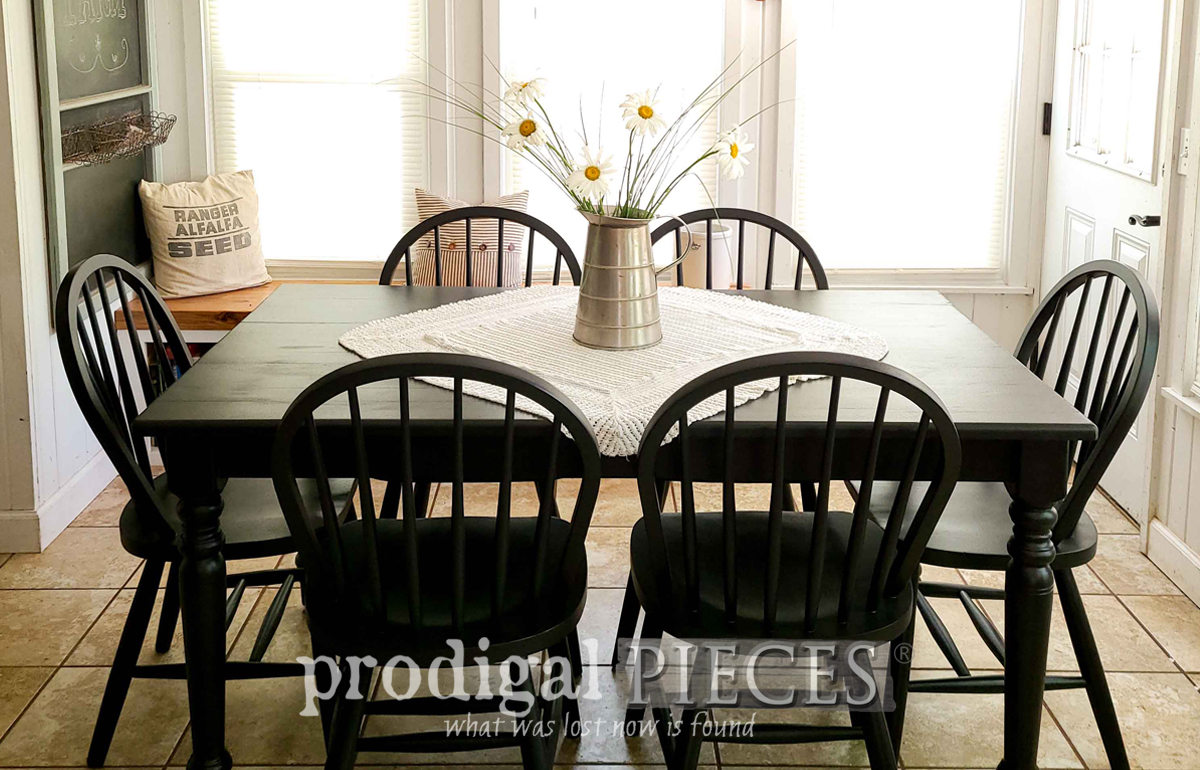
Here is my curbside dining set with a brand new look. The stains are no more and it is ready for many more years of use and love.
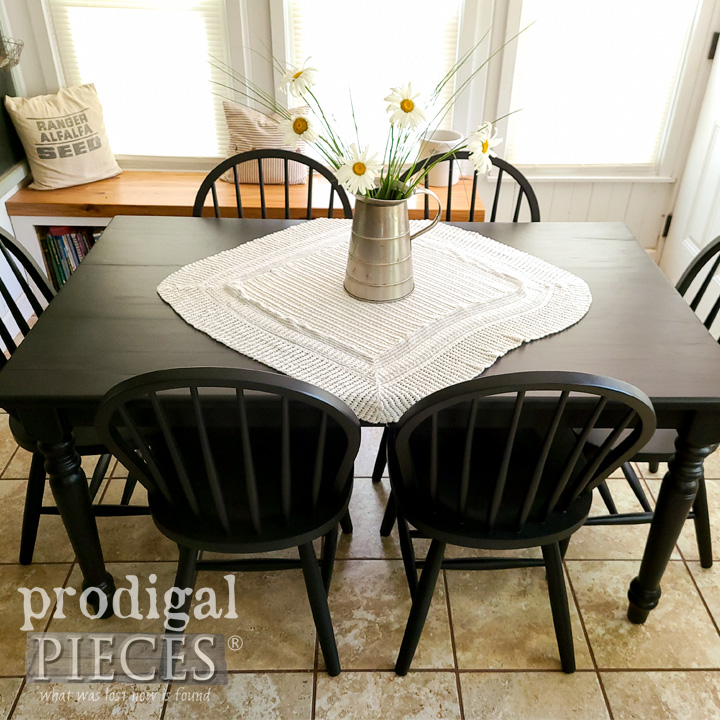
Isn’t the difference amazing? No one would guess this set was left on the curb and had also been used outside. I love DIY! The best part is that you can do this too. All you need to invest is time to learn a bit of know-how, and also have a willing spirit. Also, there is no doubt that having the right tools make the job easy and enjoyable too. You can tackle your own DIY project and inspire others too!
This sponsored post was created by Prodigal Pieces. I invite you to come see my other DIY projects from furniture, to remodeling, sewing, crafting and even my online shop at Prodigal Pieces. Until next time!
Download project steps & shopping list
We'll never share your email with anyone else.