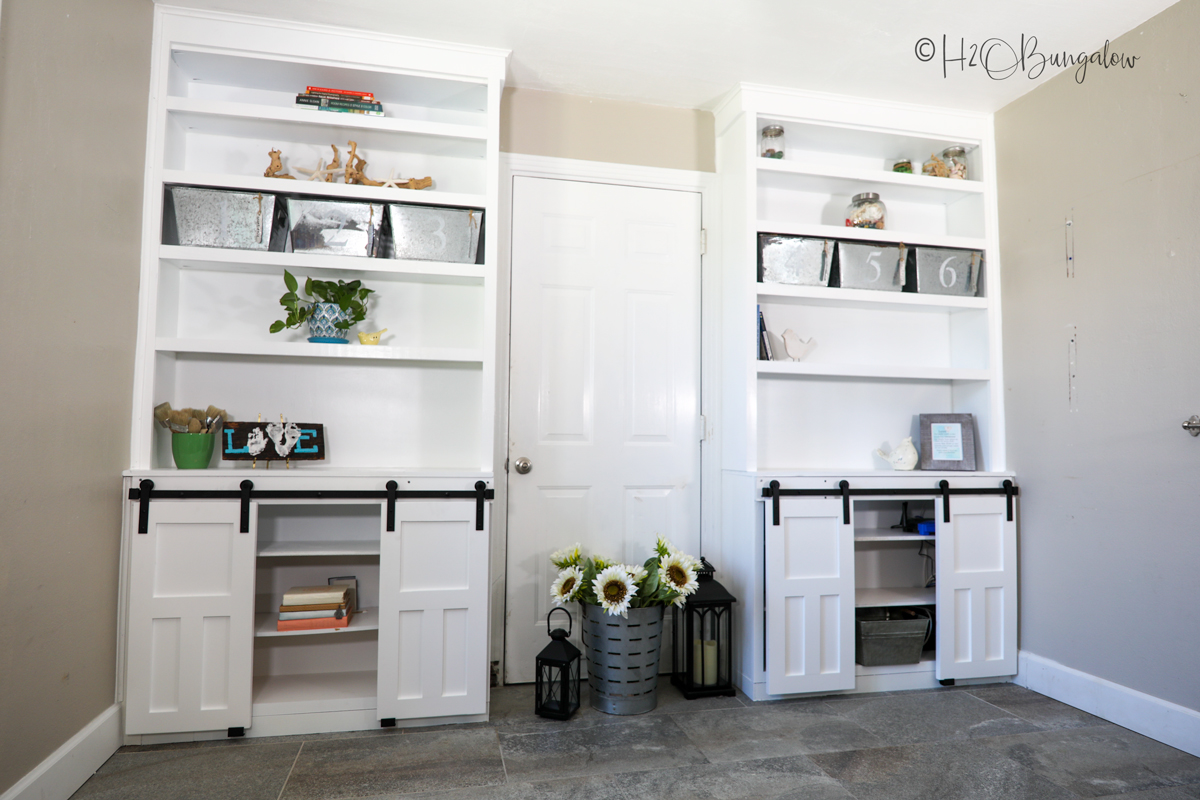
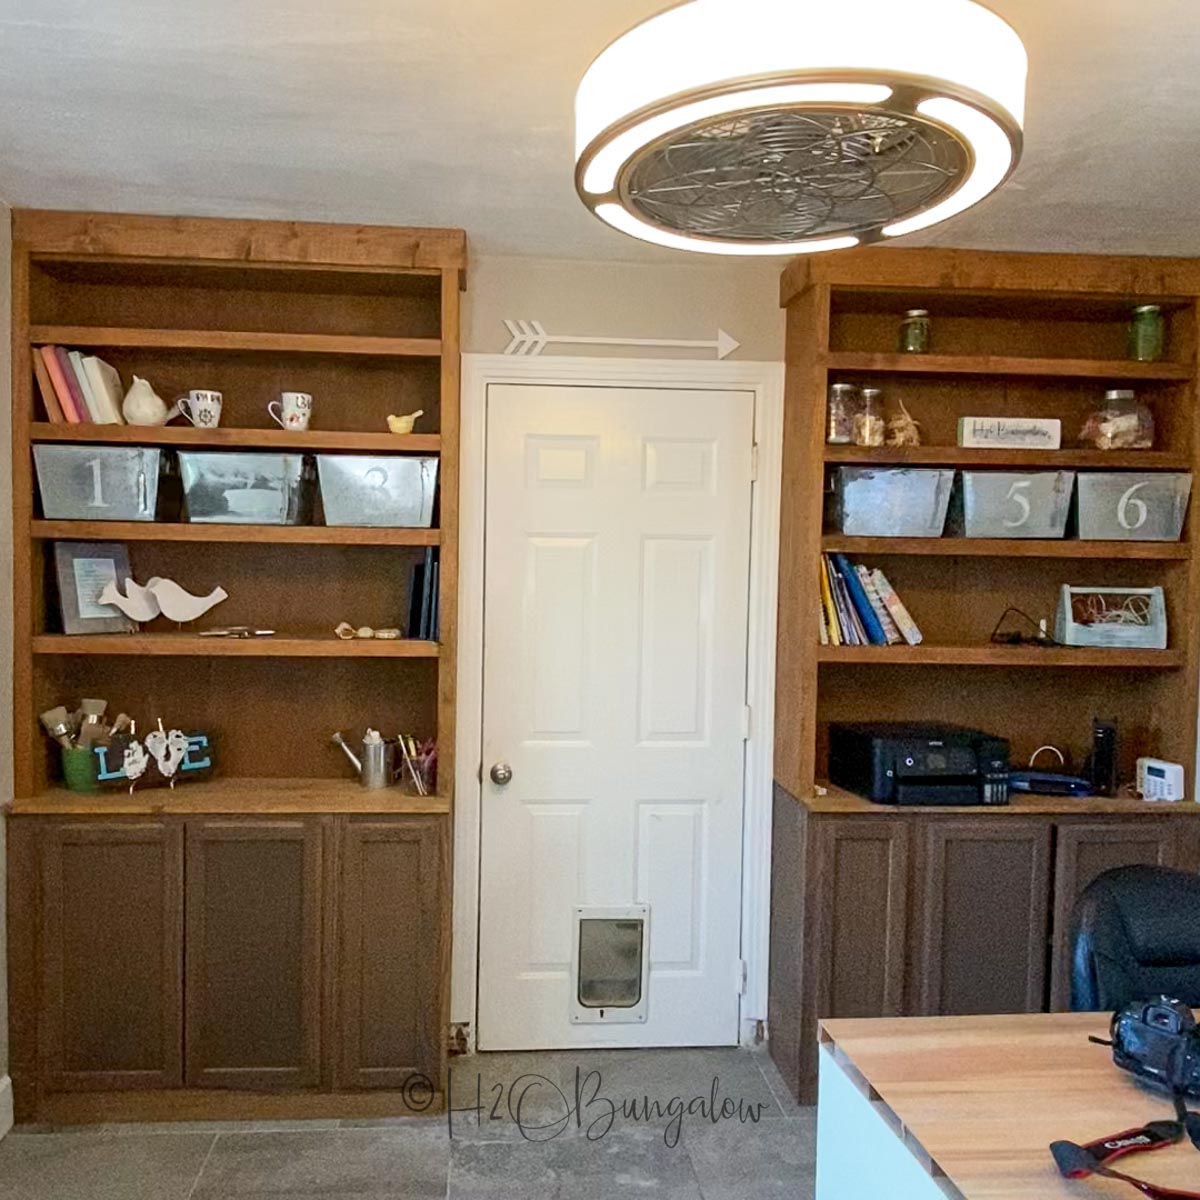
Painted Built Ins
Learn how to paint and update built ins to create a whole new look and feel in your living space! Painted built ins can bring your room into the modern era.
Hi I’m Wendi from H2oBungalow.com Today I’m going to share with you how to give old built-in cabinets a fresh new look by painting them with the Super Finish Max paint sprayer and building shaker style mini-barn doors to replace the traditional cabinet doors.
Below, you’ll find the basic steps for this project and a video. If you need more details and instructions on how I painted the built in cabinets and built the shaker doors, you’ll find those details in my post How To Update Old Built Ins Cabinets and Shelves.
Supplies needed to update cabinets
- Super Finish Max Sprayer
- Extra Super Finish Max paint containers, 2 for paint 1 for water
- White latex paint
- Latex primer, tinted grey
- Painter’s rags
- Painter’s tape
- Masking paper
- Drop cloths
- Simple Green
- Safety goggles
- Respirator
- Cabinet doors, reuse what you have or build new ones
- Mini barn door hardware
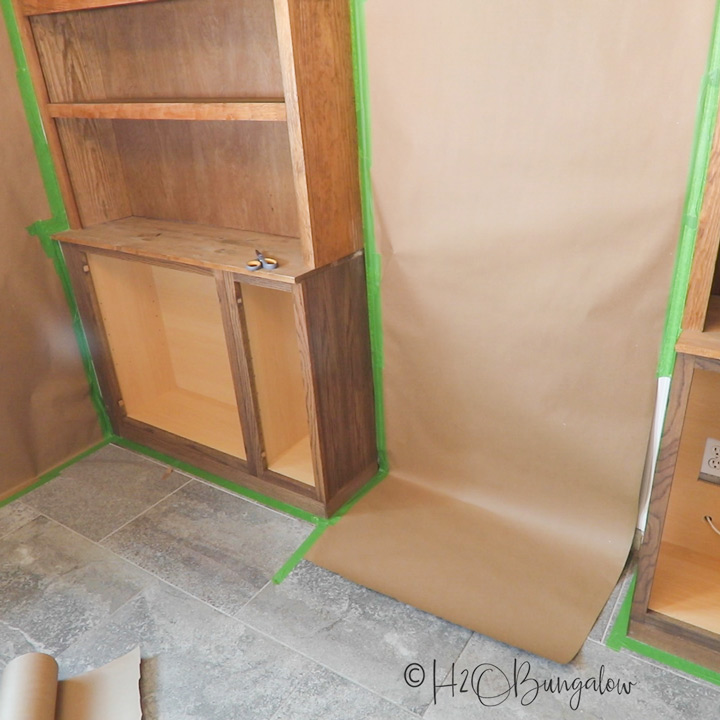
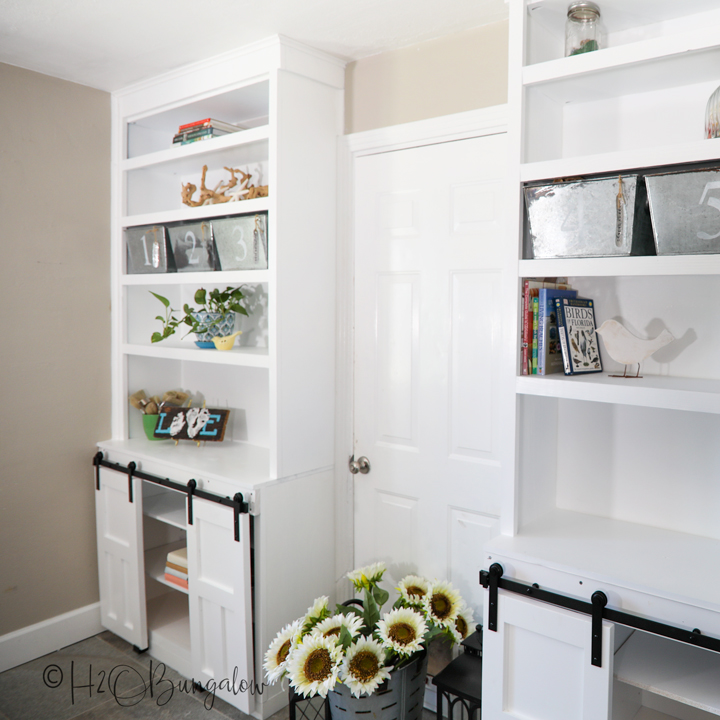
Step 1: Prepare the built-in shelves for painting
Remove the cabinet doors, shelves and all hardware. Degloss and clean any wood surface you plan on painting with Simple Green and a clean rag. Be sure to clean the shelves too.
Use painters tape, masking paper and drop cloths to protect the walls, floors and ceiling.
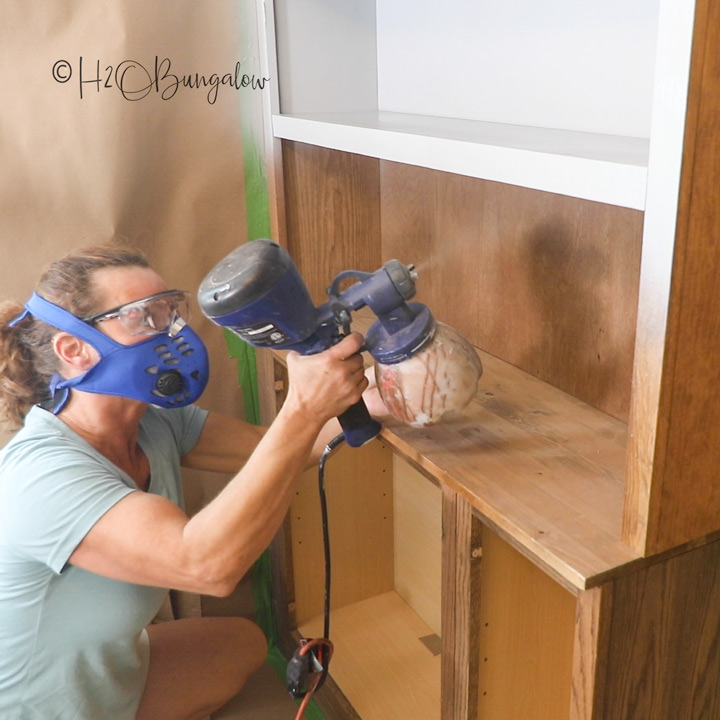
Step 2: Spray the built ins
I used two coats of water-based primer followed by two coats of white paint in my Super Finish Max paint sprayer. Be sure to add water as needed to thin the paint before spraying.
Using a Finish Max Paint Sprayer is easy. Always do a test spray to adjust the paint flow, choose a vertical or horizontal spray pattern, pull the trigger and spray in a slow even motion moving your arm with the sprayer so the paint is applied evenly. Apply the paint from the top down on the cabinets, moving slowly enough to get a thin, even coating. Be sure to get the top underside of the shelves and the sides well too.
Allow the paint to dry completely between coats.
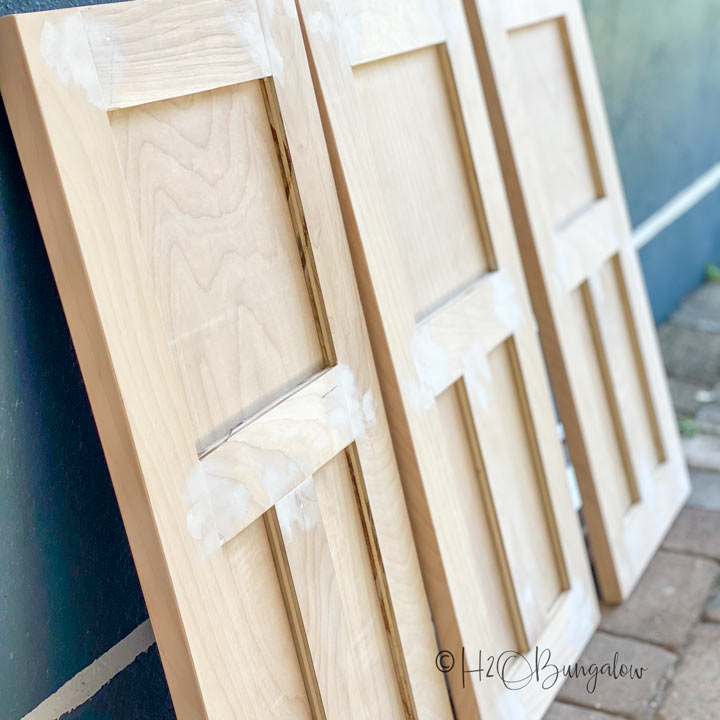
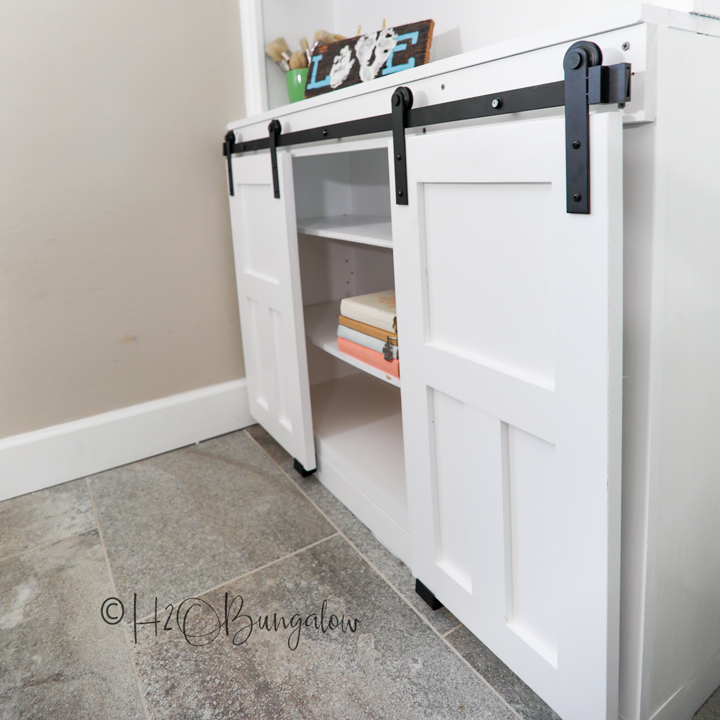
Step 3: Build the new doors
I built two doors for each cabinet base. They are large enough to cover the base cabinet frames. The center will stay open. Mine were built using ½” plywood and edge banding.
You may also be able to reuse the cabinet doors you already have if you don’t plan on changing the style.
Step 4: Paint doors and trim
Following the same steps as above to use the Super Finish Max, paint the doors, the shelves, any trim you’re adding and the headers for the barn door hardware. Painting them outside was the best choice. Paint both sides of the shelves and doors.

Step 5: Attach the barn door hardware
I attached a painted 1x4” select pine board as the header onto the cabinet base. Then attached the barn door rail to the header. Follow the directions included with the barn door hardware to hang the rail and attach the rollers to the door.
This sponsored post was created by H2O Bungalow. Looking for more DIY projects to use your HomeRight products on? You’ll find lots of different types of home decor and home improvement project tutorials using a HomeRight Super Finish Max paint sprayer and other HomeRight products on my blog at H2OBungalow.com.
Download project steps & shopping list
We'll never share your email with anyone else.