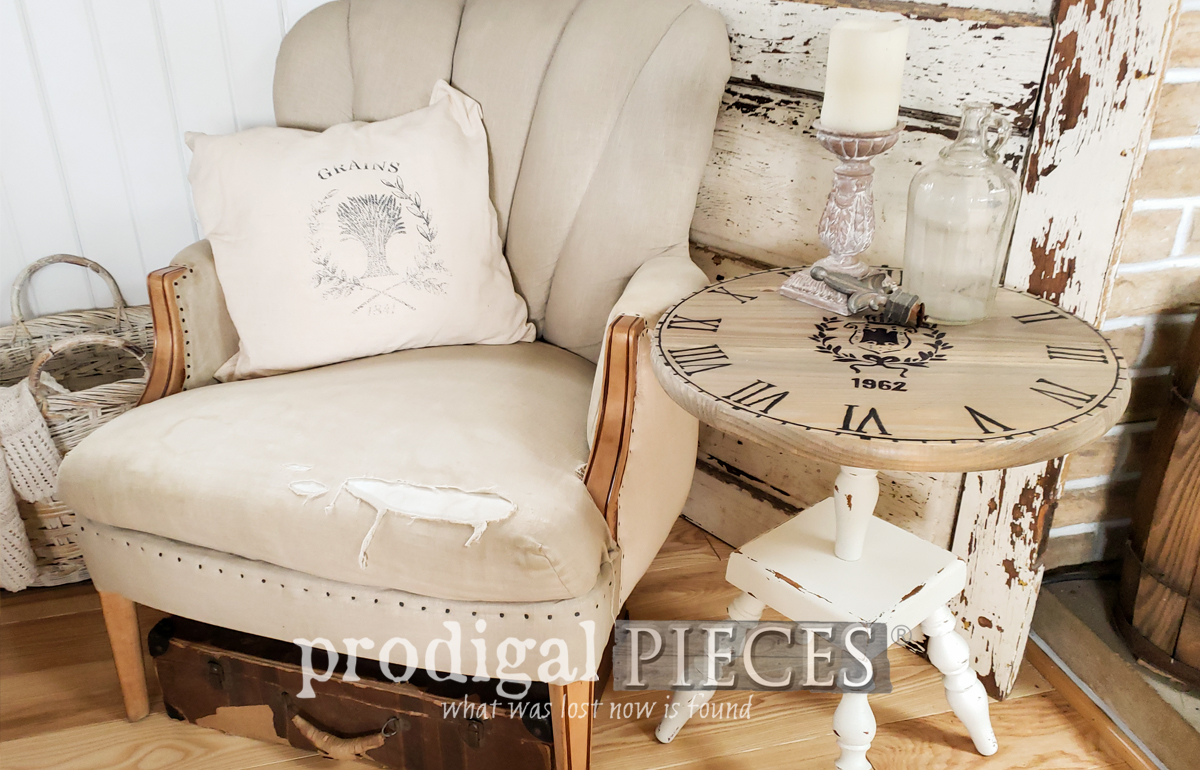
Repurposed Clock Face Table
Learn how to transform a small ash tray table into a clock face themed table using the new HomeRight Quick Finish paint sprayer.
We’re all feeling a little cooped up and maybe feeling the need to express our creative side, right? Well, let’s have some DIY fun today with a brand new product released by HomeRight {{applause}} I’m creating a repurposed clock face table using a misfit ash tray stand. You can do this too!
Step 1:
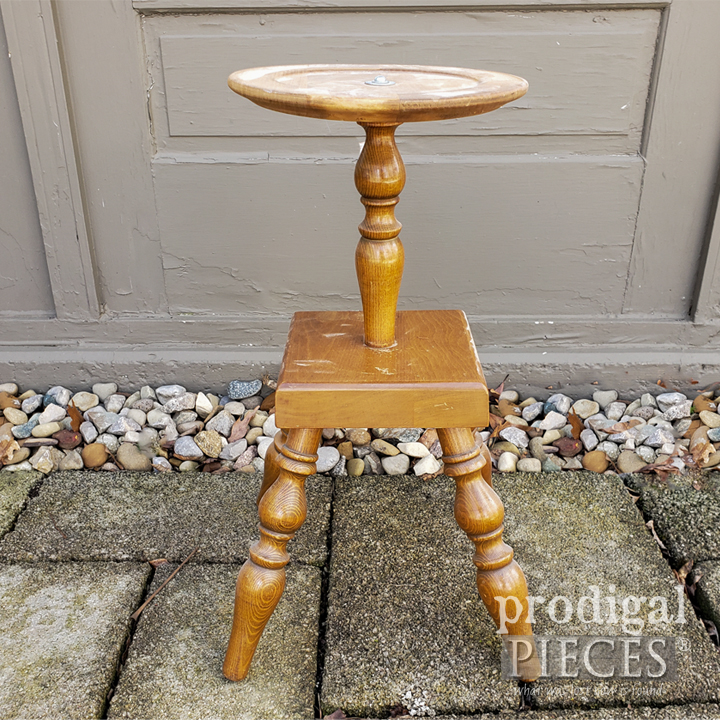
First, take a peek at what I found at a local sale for a few bucks. It’s a vintage ash tray stand that used to have a glass dish resting on top for cigarettes and their ashes. To me, it looks like the perfect candidate for adding a table top.
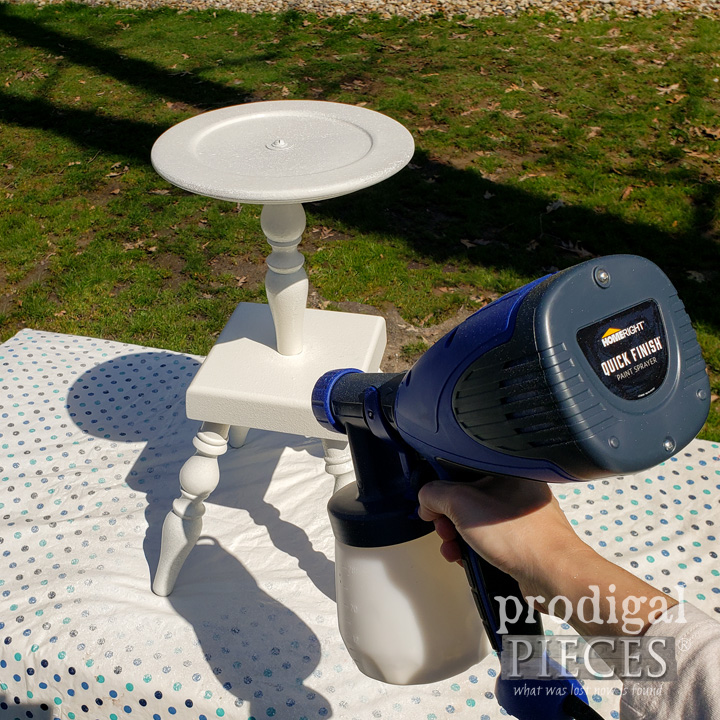
Step 2:
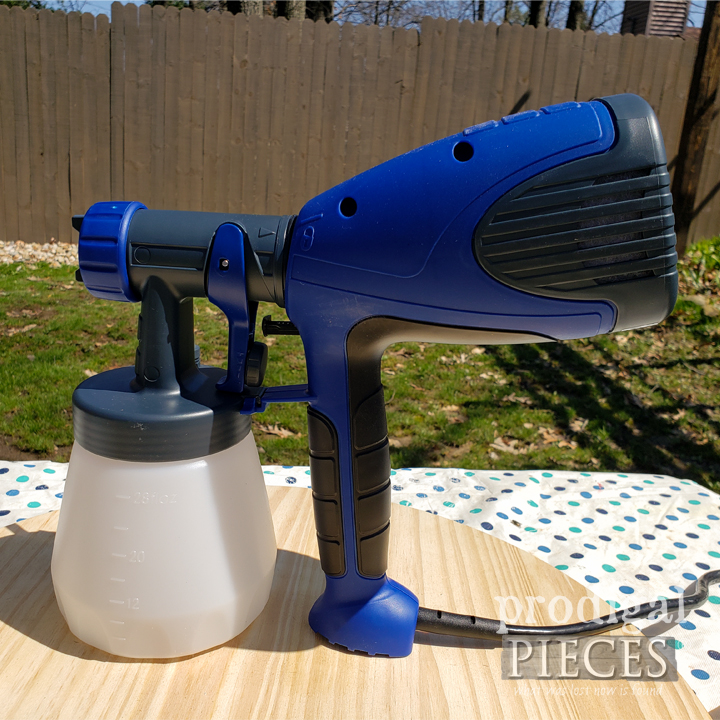
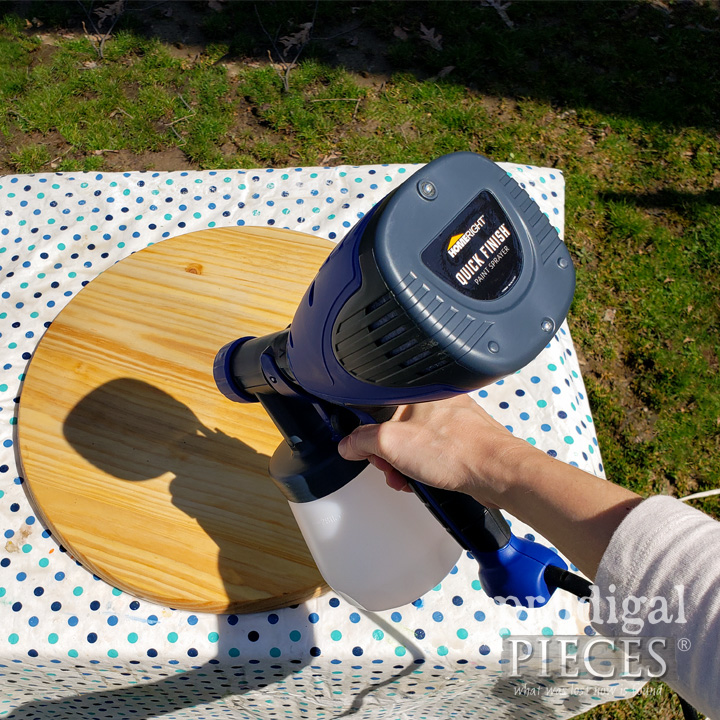
Next, I purchased a basic wood round from a home improvement store. With both items ready to go, it’s time to bring out the new Quick Finish Sprayer. It’s designed to be easy to use, fast setup, and perfect for the newbie or seasoned pro. The Quick Connect features allows you to disconnect the canister and nozzle for easy cleanup and quick change from paint to stain to poly. Perfect for uses of all mediums - following manufacturer thinning instructions.
Step 3:
Then, I begin by filling the Quick Finish with a natural reactive stain. My goal is to soak the wood so that the stain can penetrate and react with the tannins in the wood to age it beautifully and quickly. It will be a wonderful patina in less than an hour.
Step 4:
While I still have a crush on my other HomeRight sprayers, I’m quickly hooked on this new tool. See my past projects . Within 10 minutes I clean up the sprayer from stain and have filled it with paint for the base. I chose an antique white for a lovely contrast to the aged wood of the top.
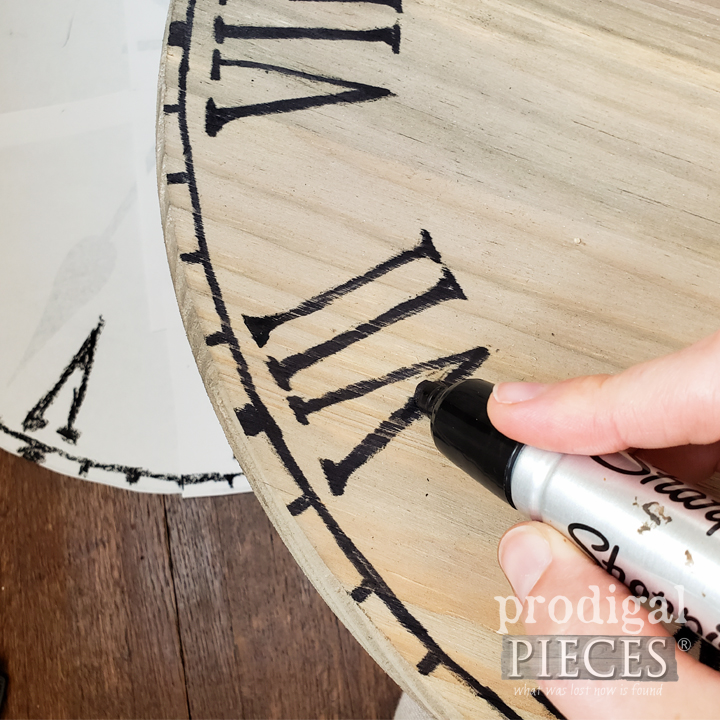
Step 5:
However, before I call my project complete, I want to add whimsy to the top. That’s where the clock face comes in. I created a template using my transfer tutorial. Simply trace the design onto the wood using my method.
Step 6:
Then, after I trace the transfer onto the wood, I fill in the design using various sized permanent markers. I really do enjoy hand-painting my typography as well, but in this case markers were a better fit.
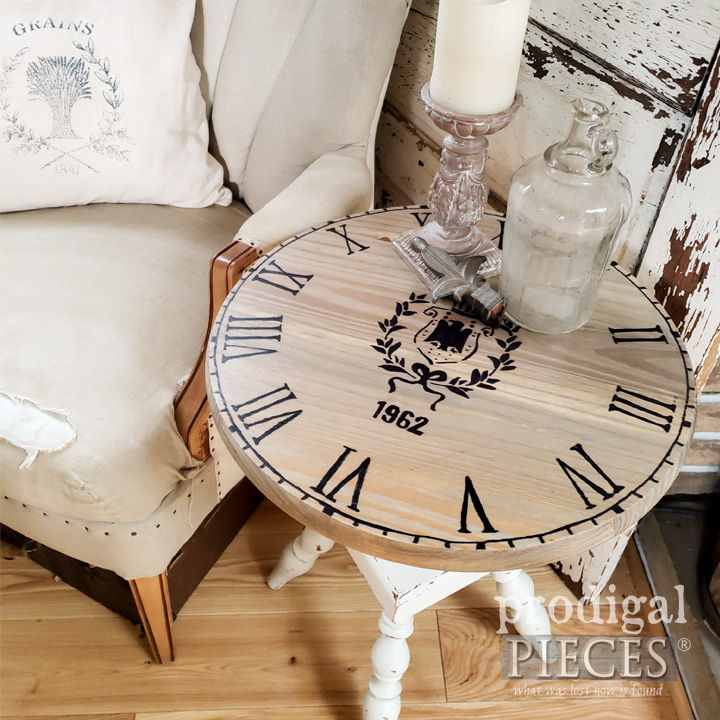
Step 7:
Last, when all is prepped and ready to go, I use my Quick Finish Sprayer to apply a coat of poly to seal it and protect it. This will provide many years of use and make my job even easier. Now my table is complete and ready to go. Isn’t that sweet?
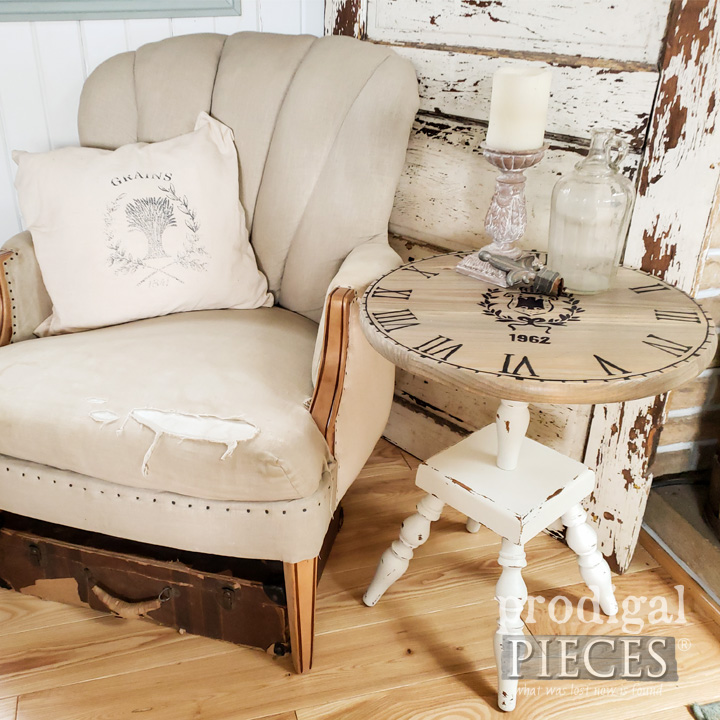
Step 8:
This kind of project just goes to show it doesn’t take oodles of time or money to create unique pieces for your home. The right tools make the job even easier and a whole lotta fun too. I know you can do it DIY style and inspire others while you’re at it.
This sponsored post was created by Prodigal Pieces. I invite you to come see my other DIY projects from furniture, to remodeling, sewing, crafting and even my online shop at Prodigal Pieces where you can find these buckets available for purchase. Until next time!
Download project steps & shopping list
We'll never share your email with anyone else.