Spring Salvaged Decor
Learn how to create unique spring decor from curbside finds or broken, old or unused furniture! Apply a fresh finish with a HomeRight sprayer.
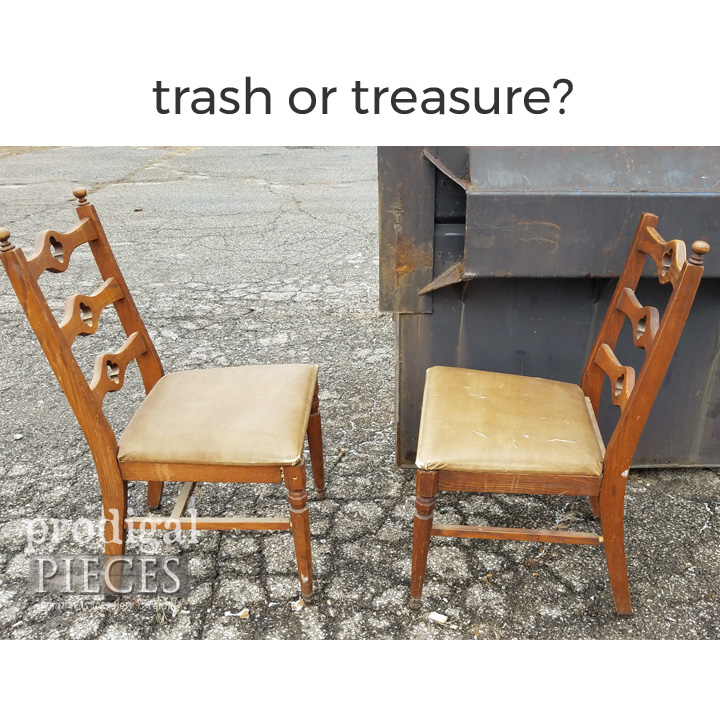
It’s the time of year when spring fever is real. tsk. Being tucked in for long winter days are no long cozy, but the reality of cabin fever creeps in. What to do? Create your own salvaged spring décor from curbside finds or the broken and derelict. For example, I’m taking these two broken chairs destined for the dump and remaking them new.
Step 1:
When my son sent me this picture asking me if I’d like them, I couldn’t resist. Why? At first glance, you see missing parts, damage, and dirt. However, I see solid oak, turned legs, and plenty of wood to spare. Now do you see it too?
Step 2:
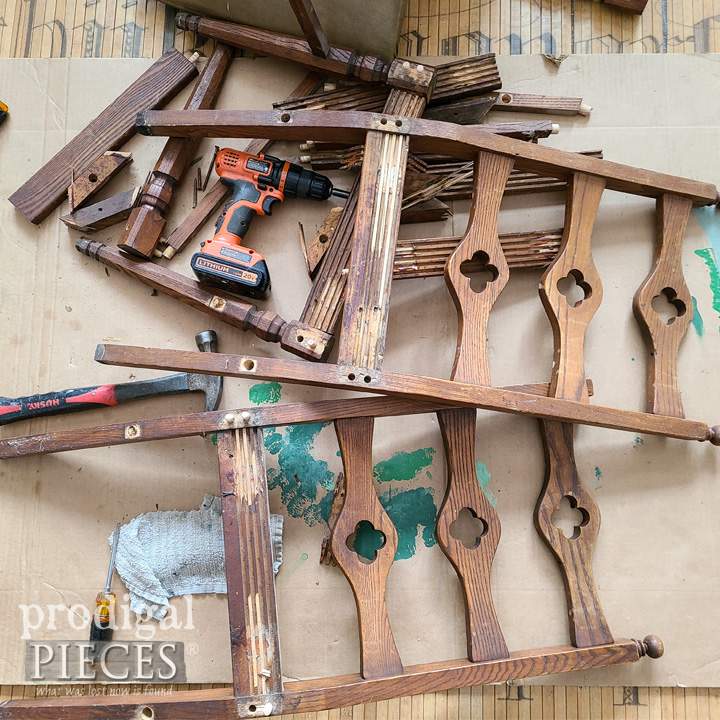
In order to get the best blank slate, I always disassemble my #trashure to be able to look at the parts individually. That, then, allows me to form ideas and be creative. Here is my pile of potential. Do you see it?
Step 3:
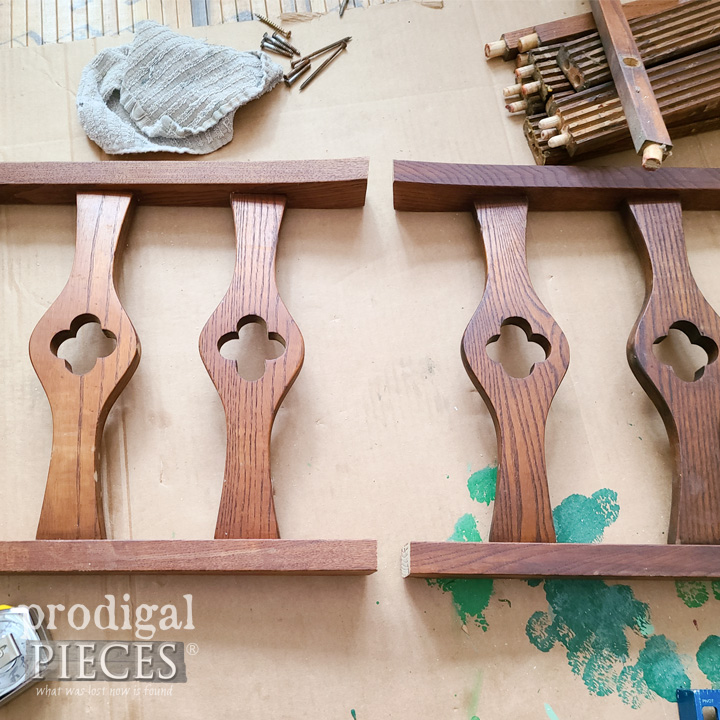
For today’s purpose, I’m focusing on the chair backs. The splats remind me of clover we see in the springtime. First, I use my circular saw to buzz the legs off. I do cut them at an angle because the chair backs are on a slight recline and I want them to rest together flush.
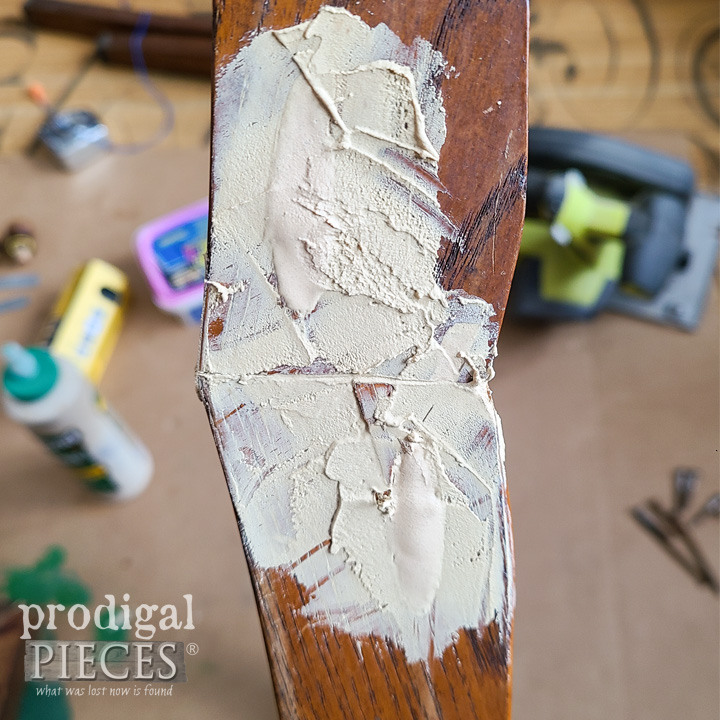
Step 4:
Next, I add pocket hole joints on opposing sides with my Kreg Jig. To finish them off, I add wood filler and sand smooth.
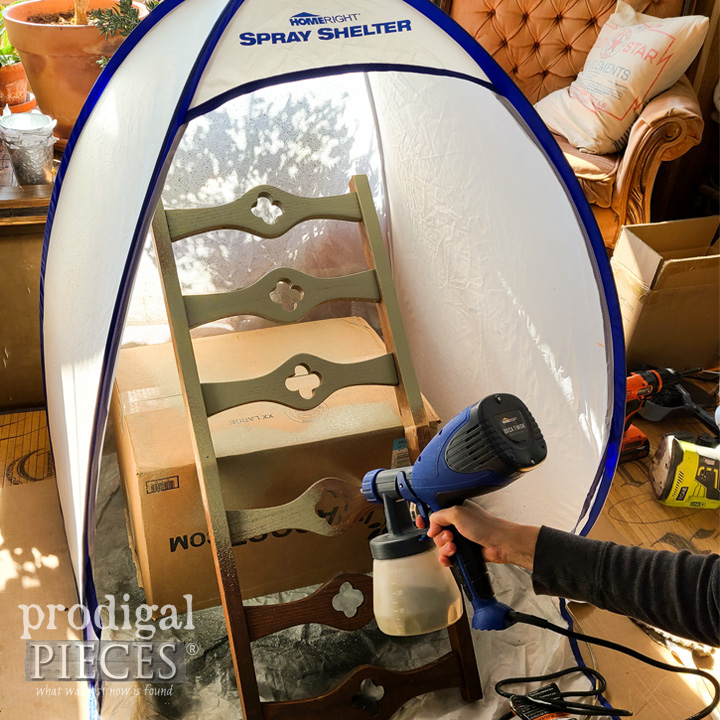
Step 5:
Now it’s time for the real fun. Paint time! It’s a no brainer for me to use my Small Spray Shelter when the temps outside are barely breaking 10˚F. Brrrr… Also, I am using my Quick Finish Sprayer. A perfect tool for a simple job like this and suited for paint, stain, and poly.
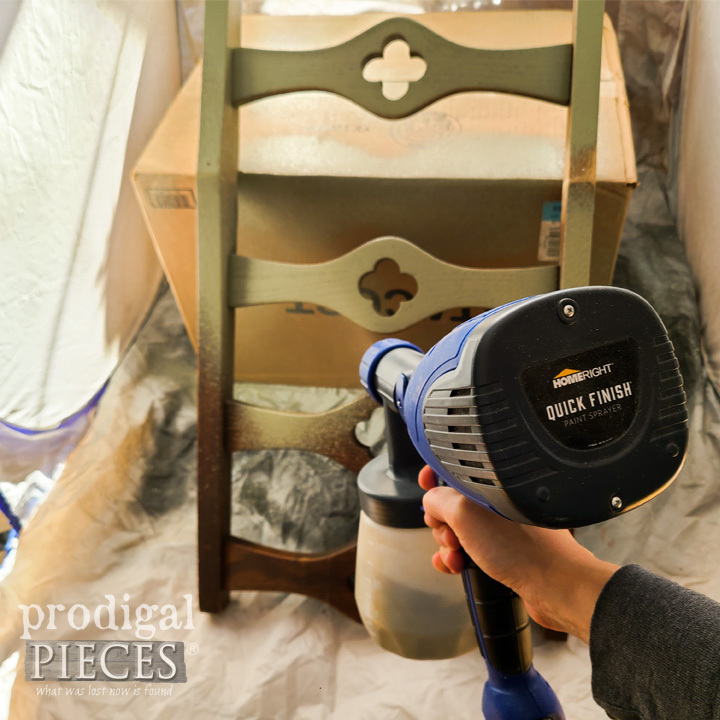
Step 6:
The Quick Finish is easy to setup. Just follow the manufacturer instructions for the material you’re using and fill the canister. Then, before beginning to spray your project, take a second to get settings optimized by spraying a piece of cardboard or scrap wood.
Step 7:
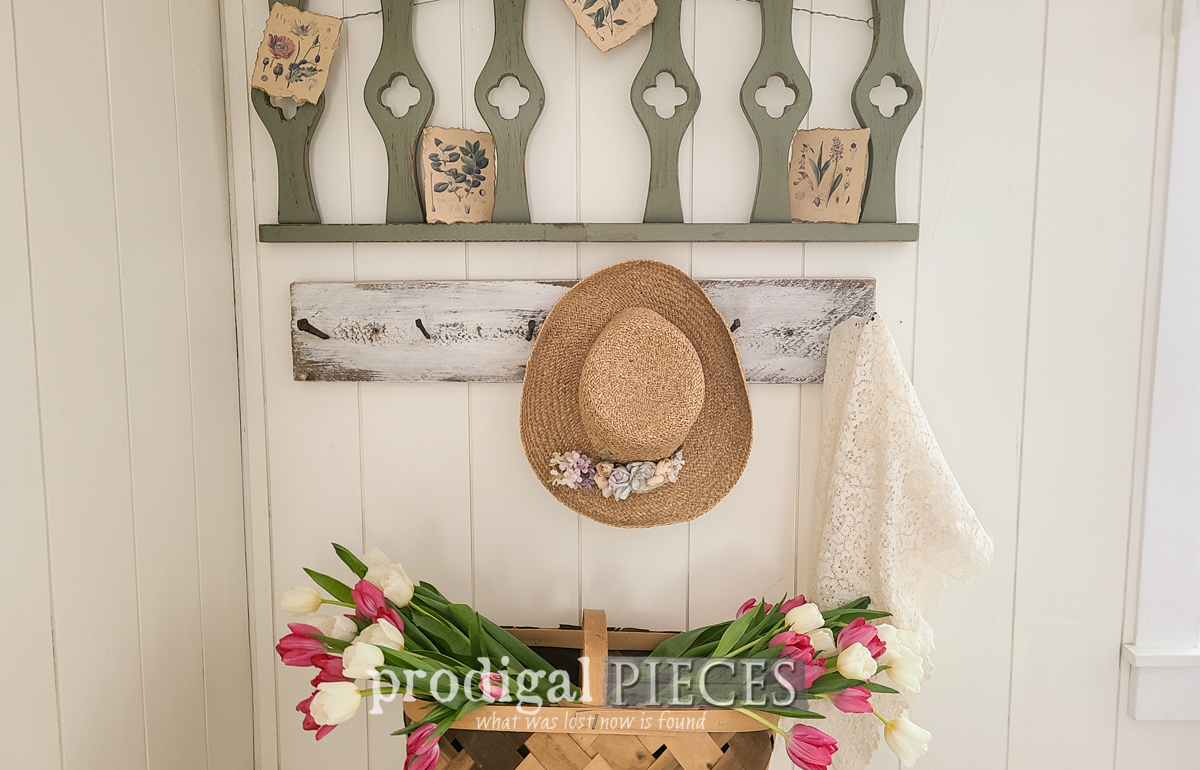
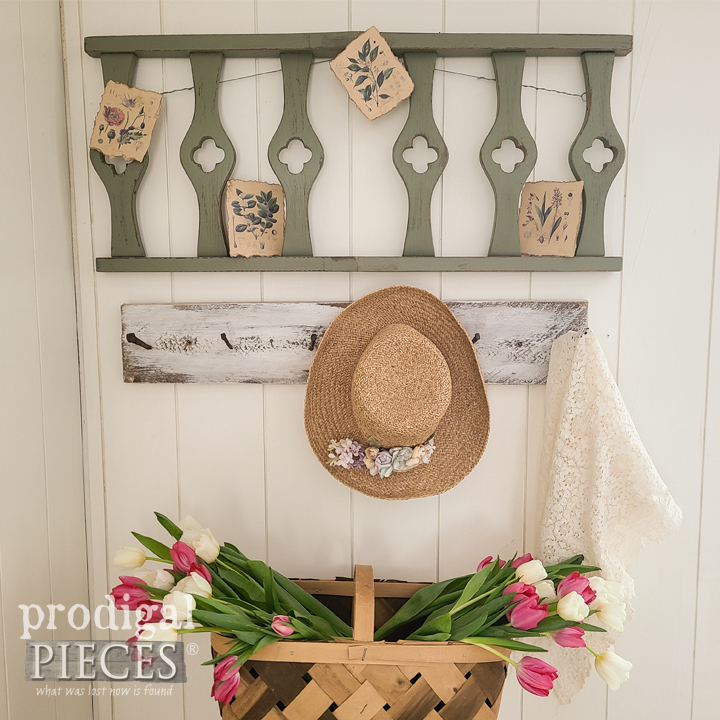
Finally, after only one coat, and a bit of time-worn distressing, my salvaged spring décor from broken chairs is complete. I think it is reminiscent of a piece of porch railing, don’t you? I just love the charm and the story it adds to my home. I hope you are inspired to create your own home story too. I’ll be sharing what I use the rest of the chair parts for on my blog and online shop at Prodigal Pieces. Feel free to ask questions and share. Until next time, be happy and DIY.
Download project steps & shopping list
We'll never share your email with anyone else.