Upcycled Craft Cart
Learn how to create and paint an upcycled craft cart out of an old wine rack by using the new Quick Finish paint sprayer to get a smooth finish.
Tis the season for spring cleaning, which means there is #trashure™ to be found at Curb le Chic. Translation: there is a whole bunch o’ potential set curbside for you to nab. I’m never shy about taking a chance on a free item. Today, I’m sharing what I did with this wine rack I found curbside to turn it into a craft cart or multipurpose cart.
Step 1:
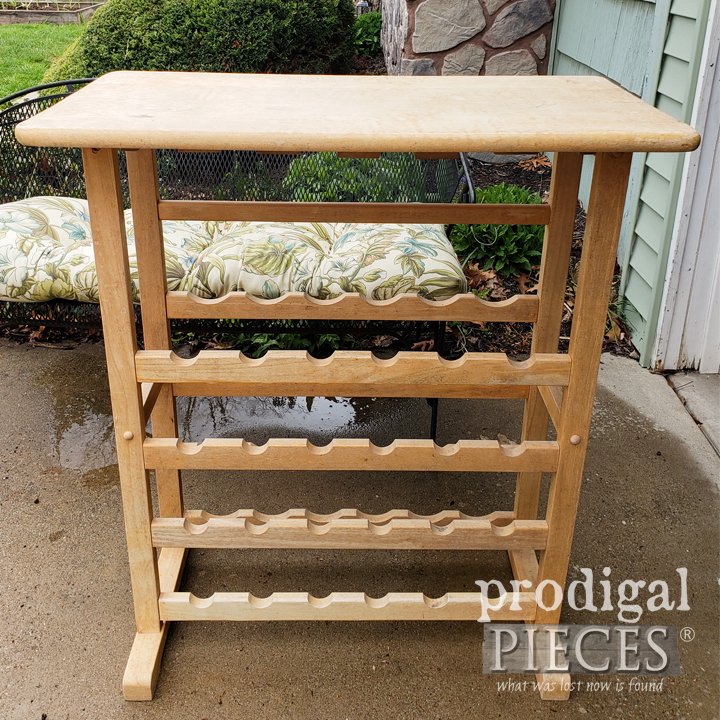
Initially, take note that this rack was out in the elements for quite some time, so the finish is worn and the top has a crack. However, it is solid and ready for a new lease on life. I spy potential, do you?
Step 2:
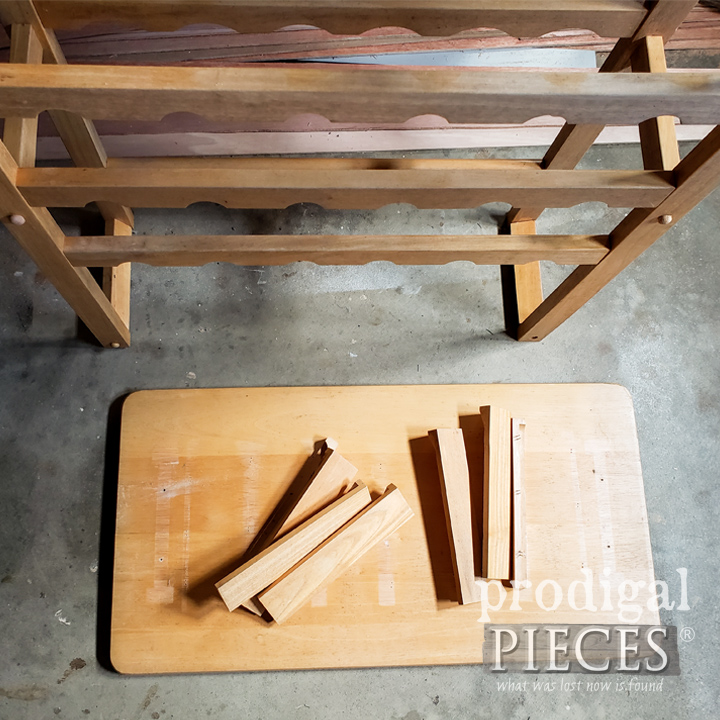
First, I begin by disassembling the top from the rack and removing the wine glass holders. This allows me to refinish the top with my sander, and then add a stain and poly as a protectant.
Step 3:
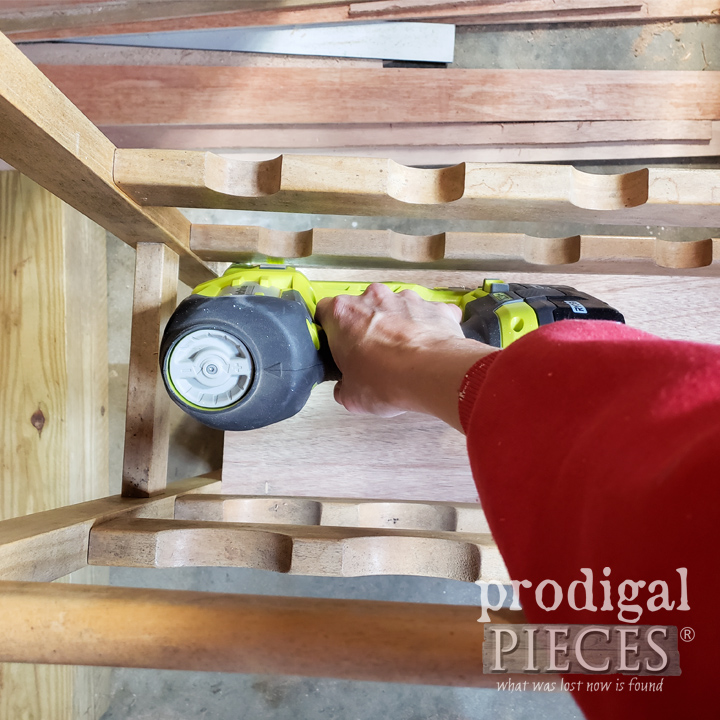
Before I can start the finish work on the rack, I need to add a few things. I cut four pieces of ply to use as shelving and attach with my nailer. This allows for extra storage without having to do much to the rack itself. Notice I’m working from the bottom up for ease of assembly.
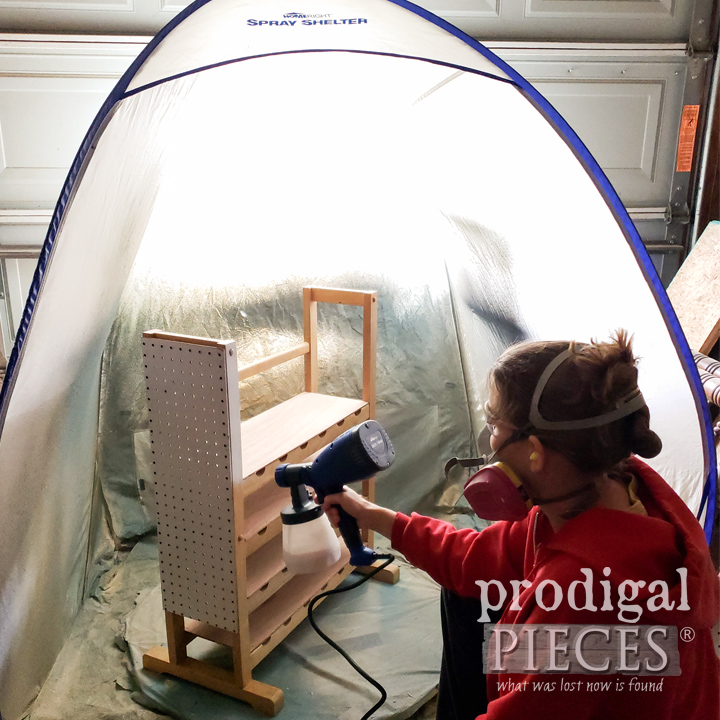
Step 4:
Next, it’s time to bring on the paint fun! With the base rack ready to go, it’s time to bring out the new Quick Finish Sprayer. This is my second time using it and it’s fun! You can view my video demo HERE to see it in action. It’s designed to be easy to use on smaller projects, fast setup, and perfect for the newbie or seasoned pro.

Then, I begin by filling the Quick Finish with a simple white paint to contrast the stain I’ve added to the top. You can get a feel for the flow by practicing on scrap wood or cardboard. Take a minute to adjust to the setting suited to your project, and then have at it. Also, I’m using my Medium Spray Shelter and my DIY Furniture Turn Table .
Step 5:
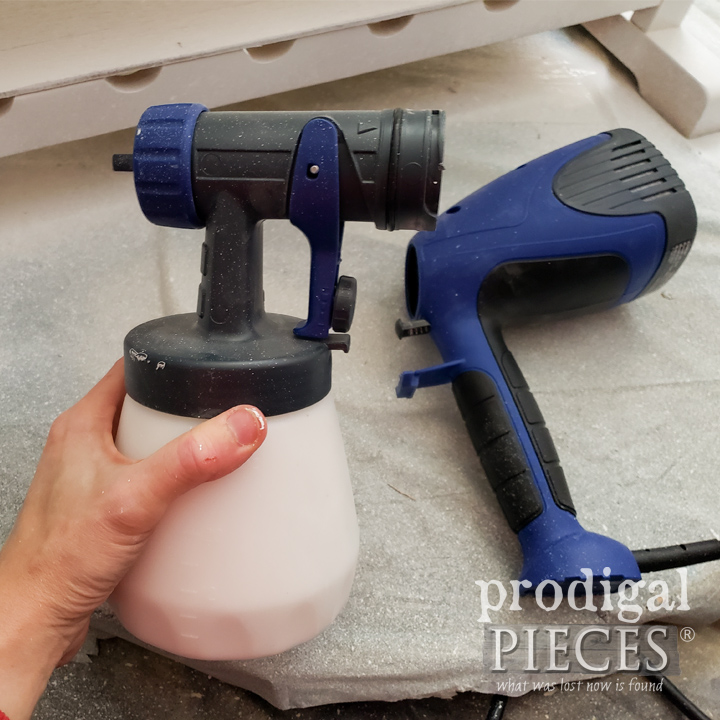
In a few minutes, the first coat is done and curing. Then, I simply pop off the nozzle with the Quick Connect feature that makes cleaning this sprayer a breeze. You want to be sure to clean it out between uses to prevent clogging. Less hassle for the win!
Step 6:
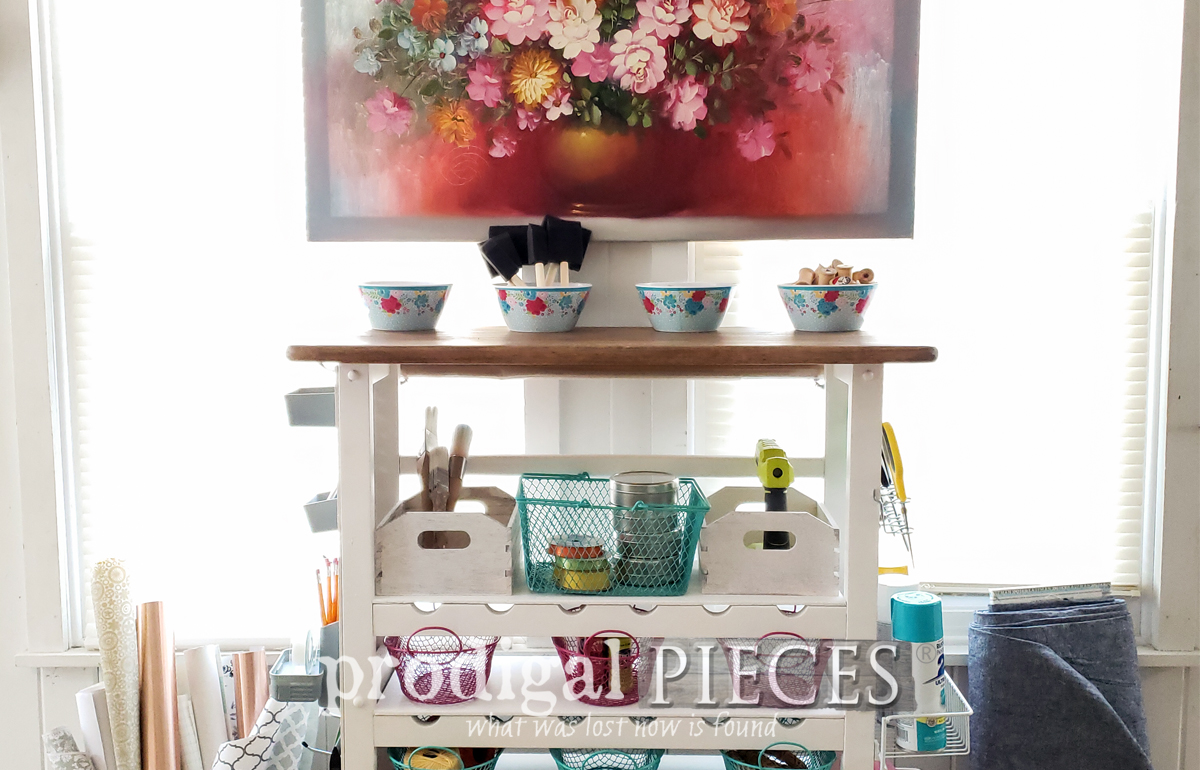
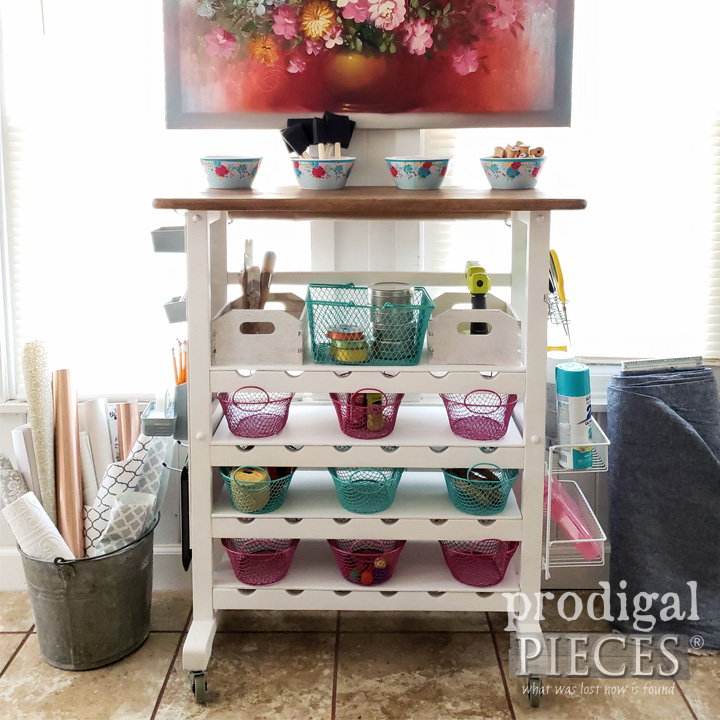
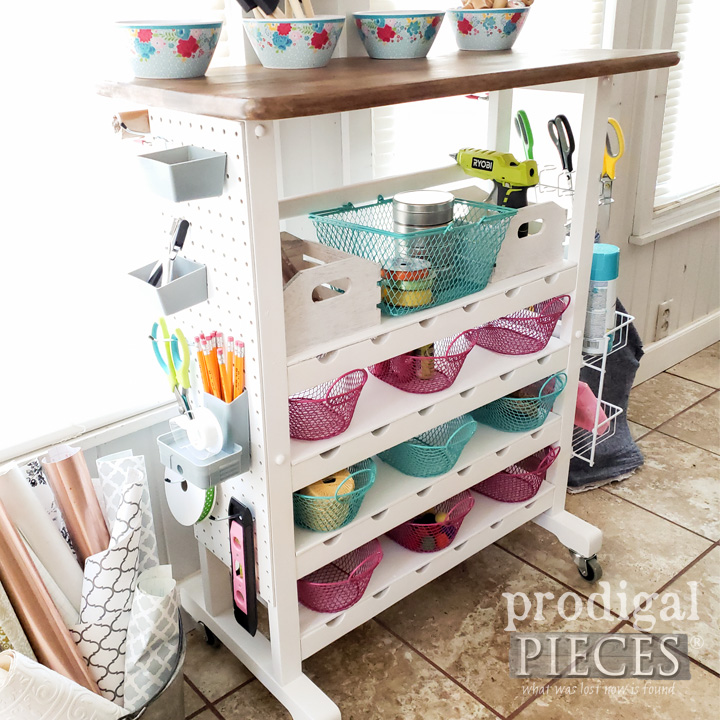
Finally, my upcycled craft cart is complete. I’ve had a blast (literally) painting and adding bits and baubles to this creation. It now can function in most any room of your home – kitchen, bath, office, kids’ room, and more. Isn’t it fun?!
Step 7:
This kind of project just goes to show it doesn’t take oodles of time or money to create functional pieces for your home. Undoubtedly, having the right tools make the job easy and enjoyable too. You can tackle your own DIY project and inspire others while you’re at it your own project.
I invite you to come see my other DIY projects from furniture, to remodeling, sewing, crafting and even my online shop at Prodigal Pieces where you can find this cart available for purchase. Until next time!
This sponsored post was created by Prodigal Pieces. Head to the blog for the full post and details.
Download project steps & shopping list
We'll never share your email with anyone else.